Barska Rifle Scope Review: Guide for You

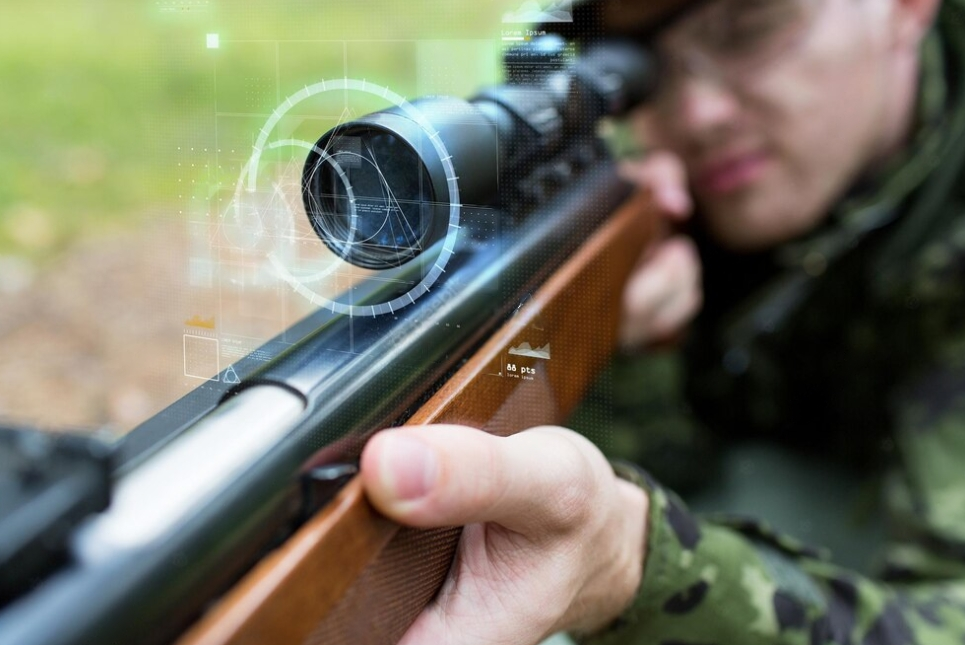
If you’re an avid hunter or a competitive shooter, having a reliable and accurate rifle scope is essential to improving your accuracy and overall shooting experience. Barska, a renowned optics manufacturer, offers a range of rifle scopes designed to meet the needs of different shooters. In this Barska rifle scope review, we’ll explore the key features, pros and cons, and provide you with valuable insights to help you make an informed decision.

Barska Rifle Scopes Overview

Barska has earned a reputation for producing quality optics at an affordable price point. Their rifle scopes are no exception, offering a variety of models suitable for various shooting applications, including hunting, target shooting, and long-range precision shooting.

Key Features of Barska Rifle Scopes

  • Variable Magnification: Barska scopes often feature adjustable magnification levels, allowing you to zoom in on distant targets or have a wider field of view, depending on your shooting requirements;
  • Durability: Barska scopes are built to withstand harsh outdoor conditions. They are often shockproof, fogproof, and waterproof, ensuring they perform reliably in various weather conditions;
  • Reticle Options: Barska offers a range of reticle options, including crosshairs, illuminated reticles, and bullet drop compensators (BDC), allowing you to choose the one that suits your shooting style;
  • Objective Lens Diameter: Depending on the model, Barska scopes come with varying objective lens diameters, which affect light transmission and low-light performance.

Barska Rifle Scope Models

Barska offers a diverse lineup of rifle scopes, each catering to specific shooting needs. Here are some popular Barska rifle scope models:

  1. Barska Huntmaster Pro: Ideal for hunters, this series offers versatile magnification options, illuminated reticles, and rugged construction;
  2. Barska Varmint: Designed for varmint hunters, these scopes provide high magnification levels and large objective lenses to spot small targets at extended ranges;
  3. Barska SWAT-AR: Tactical shooters appreciate this series for its precision and versatility. They often feature illuminated mil-dot reticles and compact designs;
  4. Barska Blackhawk: These scopes are budget-friendly options for those who need a reliable scope for recreational shooting or plinking.

Pros and Cons of Barska Rifle Scopes

Pros:

  • Affordable pricing for quality optics;
  • A wide range of models for different shooting applications;
  • Durable construction suitable for outdoor use;
  • Clear optics and various reticle options.

Cons:

  • Some models may have limited low-light performance.
  • High-end precision shooters may opt for more expensive alternatives.

Comparison Table 

ModelMagnificationObjective DiameterEye ReliefTube DiameterIlluminationLength (inches)Weight (ounces)Waterproof
Barska Model 13-9×4040mm3.5 inches1 inchYes1216Yes
Barska Model 24-12×5050mm4 inches1 inchNo1418Yes
Barska Model 36-24×4444mm3.75 inches1 inchYes1622Yes
Barska Model 42-7×3232mm4 inches1 inchNo1014No
Barska Model 51.5-6×4242mm3.5 inches30mmYes1320Yes

This table will help you compare different Barska rifle scope models and choose the one that best suits your needs.

Understanding Reticle Types

Reticles, also known as crosshairs, are an essential component of a rifle scope. They aid in aiming, target acquisition, and shot placement. Barska offers various reticle types to cater to different shooting preferences and scenarios. Here’s a breakdown of some common reticle types you might encounter:

  1. Duplex Reticle: The Duplex reticle is one of the most straightforward and widely used reticle types. It features thicker outer lines that taper down to thinner crosshairs in the center. This design allows for quick target acquisition and precise aiming;
  1. Mil-Dot Reticle: The Mil-Dot reticle incorporates tiny mil-dot markings along the crosshairs. These dots serve as reference points for estimating the distance to your target. Mil-Dot reticles are favored by long-range shooters and tactical enthusiasts;
  1. BDC Reticle (Bullet Drop Compensator): BDC reticles are designed to help compensate for bullet drop at various distances. They feature additional aiming points or hash marks below the central crosshair. Shooters can use these marks to adjust their aim for different target ranges;
  1. Illuminated Reticle: Barska offers scopes with illuminated reticles, allowing you to switch on a backlight for better visibility in low-light conditions. This feature is invaluable for dawn or dusk hunting and tactical operations;
  1. German #4 Reticle: This reticle type is characterized by thick lines at the outer edges, forming a bold cross. It’s a classic design that provides rapid target acquisition and is well-suited for hunting in dense cover;
  1. Mildot Illuminated Reticle: Combining the benefits of mil-dot markings with illumination, this reticle type is ideal for precision shooting in low-light environments. The illuminated mil-dots make it easier to estimate target range and make accurate shots.

When choosing a Barska rifle scope, consider the type of reticle that aligns with your shooting style and intended use. Whether you prefer simplicity, long-range precision, or low-light performance, Barska offers a variety of reticle options to enhance your shooting experience.

Video Explanation 

To finally answer all your questions, we suggest you to watch this video. Enjoy watching it!

Conclusion 

In conclusion, Barska rifle scopes offer a diverse range of options to cater to the needs of hunters, sports shooters, and tactical enthusiasts. With a commitment to quality and innovation, Barska has established itself as a reliable choice for those seeking affordable yet high-performance optics.

Whether you’re a long-range marksman looking for precise adjustments or a hunter navigating low-light conditions, Barska’s lineup includes scopes with features to enhance your shooting experience. From illuminated reticles to rugged construction, Barska scopes are designed to meet the demands of various shooting scenarios.

When considering a Barska rifle scope, it’s essential to assess your specific shooting requirements, including intended use, preferred magnification range, and reticle type. This will help you make an informed choice and ensure that your scope aligns with your shooting style.

Barska’s commitment to customer satisfaction and product quality is reflected in their warranties and customer support. With proper care and maintenance, a Barska rifle scope can provide years of reliable service.

FAQ

1. Are Barska rifle scopes suitable for long-range shooting?

Barska offers a range of scopes suitable for long-range shooting, including models with mil-dot reticles and adjustable turrets for precise adjustments. It’s essential to select the right Barska scope with the appropriate features for your long-range shooting needs.

2. Do Barska scopes have illuminated reticles for low-light conditions?

Yes, Barska manufactures scopes with illuminated reticles designed to improve visibility in low-light situations. These scopes are ideal for hunting during dawn or dusk and tactical operations in dimly lit environments.

3. How do I maintain and clean my Barska rifle scope?

To maintain your Barska scope’s performance, clean the lenses using a soft microfiber cloth and a lens cleaning solution designed for optics. Avoid using abrasive materials that may scratch the lenses. Additionally, store your scope in a protective case or cover when not in use.

4. What is the warranty offered on Barska rifle scopes?

Barska provides varying warranties depending on the specific model. Typically, their scopes come with limited lifetime warranties or limited warranties for a specific duration. Be sure to check the warranty details for your specific Barska scope.


How to Attract Deer with Peanut Butter: Comprehensive Guide

Deer hunting requires a combination of skill, patience, and strategy. One effective way to attract deer to your hunting area is by using peanut butter. Yes, you read that right! Peanut butter can be an excellent bait for deer if used correctly. In this comprehensive guide, we will explore various methods and tips on how to attract deer with peanut butter effectively.

Understanding Deer Behavior

Before we dive into the details of using peanut butter, it’s essential to understand deer behavior. Deer are naturally curious animals, and they are attracted to new scents and flavors. They have an acute sense of smell, which makes them highly receptive to odors in their environment. Leveraging this knowledge is key to using peanut butter as an effective attractant.

Choosing the Right Peanut Butter

Not all peanut butter is created equal when it comes to attracting deer. You’ll want to opt for unsalted, unsweetened, and creamy peanut butter. Avoid peanut butter with additives or artificial flavors, as deer can detect these and may be deterred. Natural peanut butter, with just peanuts as the ingredient, is your best bet.

Peanut Butter Techniques

1. Peanut Butter Logs

  • Take a wooden log or a piece of tree bark;
  • Spread a generous amount of peanut butter on the log;
  • Place the log in your desired hunting location;
  • Deer will be drawn to the scent and taste of the peanut butter.

2. Peanut Butter Smear

  • Smear peanut butter on nearby tree trunks or branches;
  • Create a trail of peanut butter leading to your hunting blind or stand;
  • Deer will follow the scent trail right to your location.

3. Peanut Butter Feeders

  • Invest in deer feeders designed to dispense peanut butter;
  • Fill the feeder with peanut butter and set it up in your hunting area;
  • Deer will visit the feeder regularly for a tasty treat.

Best Practices for Attracting Deer with Peanut Butter

  • Camouflage Your Setup: Ensure your peanut butter bait is hidden from sight to avoid spooking deer;
  • Regularly Replenish: Check and replenish your peanut butter baits regularly to keep the scent fresh;
  • Use Peanut Butter Sparingly: You don’t need to use excessive amounts of peanut butter; a little goes a long way;
  • Monitor Deer Patterns: Pay attention to deer movement patterns and adjust your baiting strategy accordingly;
  • Stay Scent-Free: Practice scent control by using scent-neutralizing products to mask your human scent.
A deer standing in the forest

Safety and Legal Considerations

Always adhere to local hunting regulations and guidelines when using bait to attract deer. Some areas have restrictions or specific rules regarding baiting. Additionally, ensure that your peanut butter bait does not contain any harmful additives or substances that could harm deer.

Deer Behavior and Peanut Butter Attraction

Understanding deer behavior can significantly enhance your success in attracting them using peanut butter. Deer are naturally cautious animals, and they rely heavily on their sense of smell. Here’s how their behavior comes into play when using peanut butter as an attractant:

  • Cautious Approach: Deers typically approach new food sources with caution. When introducing peanut butter, it’s essential to place it in an area where deer feel safe. Deer often approach feeding areas from downwind, so consider wind direction when setting up your attractant;
  • Peanut Butter Placement: To increase your chances of attracting deer, smear peanut butter on tree trunks or logs at a height that deer can easily access. Placing it at chest height for adult deer is generally a good rule of thumb. Avoid placing it too high or too low, as this may deter them;
  • Time of Day: Deer are crepuscular animals, meaning they are most active during dawn and dusk. Setting up your peanut butter attractant during these times can maximize your chances of drawing them in. Observing deer movement patterns in your area can help you determine the best times to set up your attractant;
  • Monitoring and Patience: Deer may not immediately approach peanut butter, especially if it’s a new addition to their environment. Be patient and monitor the area. It may take several days for deer to become comfortable with the attractant. Avoid frequent disruptions to the area to minimize disturbances;
  • Weather Considerations: Weather conditions can influence deer behavior. Rain can wash away peanut butter, while colder temperatures may increase their appetite. Consider these factors when deciding when and how to use peanut butter as an attractant.

By understanding deer behavior and employing strategic placement and timing, you can increase your chances of successfully attracting deer with peanut butter. Patience and careful observation are key to achieving your goals while respecting wildlife and local regulations.

Comparison Table 

MethodProsCons
Peanut Butter on Trees– Easy to apply– Limited to tree locations
– Attracts deer to a specific area– May require frequent reapplication
– Low cost– Attracts other animals like raccoons
– Minimal equipment needed
Peanut Butter Feeders– Controlled dispensing– Requires a deer feeder
– Attracts deer consistently– Initial cost of feeder
– Reduced waste– May need to keep feeder stocked
– Keeps peanut butter off the ground
Peanut Butter Plots– Provides a dedicated deer feeding area– Requires land and planting effort
– Attracts multiple deer at once– Ongoing maintenance required
– Effective for hunting purposes– May require fencing to protect plot

These methods offer different advantages and disadvantages, so choosing the one that suits your goals and resources is essential.

Video Explanation 

To finally answer all your questions, we suggest you watch this video. Enjoy the video!

Conclusion 

In conclusion, using peanut butter to attract deer can be an effective strategy for hunters, wildlife enthusiasts, or anyone looking to observe these majestic creatures up close. Whether you opt for smearing it on trees, using peanut butter feeders, or creating dedicated peanut butter plots, understanding the dos and don’ts is crucial for success.

Remember to check local regulations, use peanut butter sparingly, and consider factors like the weather and the deer population in your area. Peanut butter can be a valuable addition to your wildlife management efforts when used responsibly.

FAQ

1. Is it legal to use peanut butter to attract deer?

Regulations regarding the use of bait, including peanut butter, to attract deer vary by location. It’s essential to check your local hunting laws and regulations before using peanut butter as a deer attractant.

2. Can I use any type of peanut butter?

It’s generally recommended to use unsalted, unflavored peanut butter to attract deer. Smooth or creamy varieties tend to work better than chunky peanut butter.

3. How often should I replenish the peanut butter?

The frequency of replenishing peanut butter depends on various factors, including the local deer population and weather conditions. In general, it’s a good idea to check and refill peanut butter every few days to ensure it remains attractive to deer.

4. Can I use peanut butter to attract deer year-round?

While peanut butter can be effective throughout the year, it may be most useful during the hunting season when attracting deer to specific areas is desired. However, it’s essential to consider local regulations regarding baiting and feeding.

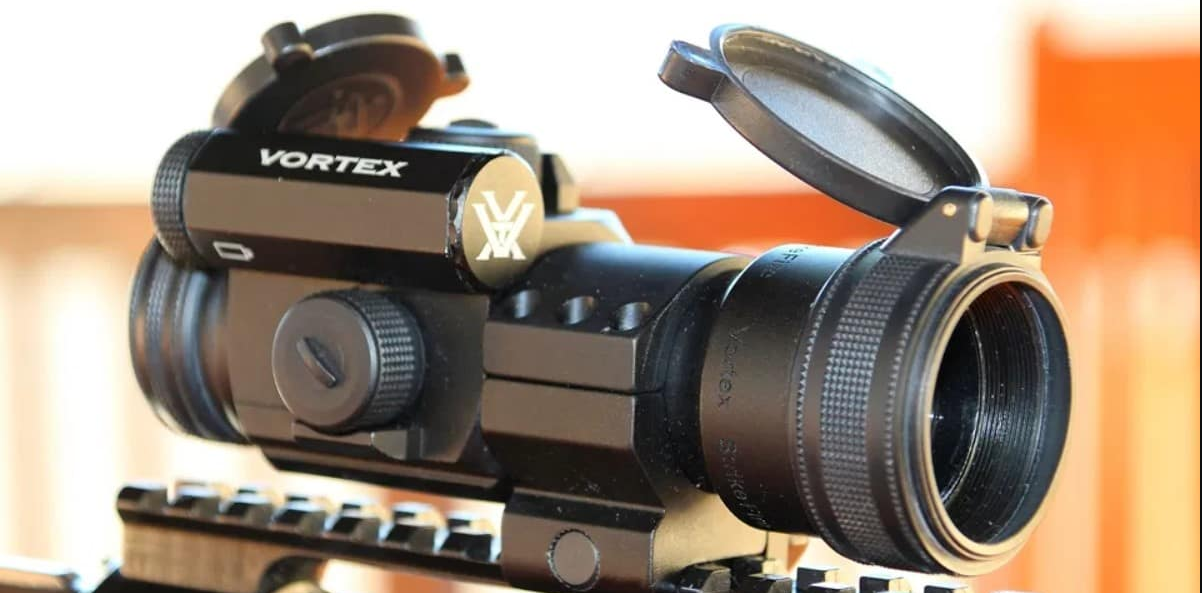
2023 Vortex Strikefire 2 Review 

When it comes to precision shooting and tactical applications, having the right optics can be crucial. Vortex has always stood out in the world of optics, and the Strikefire 2 model is no exception.

In this comprehensive review, we’ll delve into the Vortex Optics Strikefire 2, examining its features, performance, durability, and more to help you make an informed decision.

Overview of the Vortex Optics Strikefire 2

The Vortex Strikefire 2 is a red dot sight designed for fast target acquisition and engagement. Whether you’re a competitive shooter, law enforcement officer, or responsible firearm owner, this optic boasts several features that make it an attractive choice.

Key Features:

  • Red or Green Dot: One of the distinctive features of the Strikefire 2 is the option to choose between a red or green dot. This allows the shooter to select the dot color most suitable for specific conditions, whether it’s a bright sunny day or a low-light situation;
  • Unlimited Eye Relief: The unlimited eye relief provided by the Strikefire 2 ensures quick target acquisition and comfortable shooting, regardless of the shooter’s position;
  • Fully Multi-Coated Lenses: Vortex is renowned for its high-quality optics, and the Strikefire 2 lives up to that reputation with fully multi-coated lenses that provide exceptional light transmission and image clarity;
  • Shockproof and Waterproof: Built to perform in harsh conditions, the Strikefire 2 is both shockproof and waterproof, allowing it to withstand rugged field use;
  • 10 Brightness Levels: With 10 brightness levels, this optical device adapts to a wide range of lighting conditions, making it versatile for various shooting scenarios;
  • Extended Battery Life: The Strikefire 2 boasts an impressive battery life, allowing users to stay in the field longer without worrying about frequent battery replacements.

Now that we’ve covered the key features, let’s take a closer look at the operational aspects of the Vortex Optics Strikefire 2.

Performance Assessment

The primary purpose of a red dot sight is to enhance target acquisition accuracy, and the Strikefire 2 excels in this regard. The clear and crisp dot, along with unlimited eye relief, enables rapid target acquisition even in high-stress situations. 

Whether you’re engaging targets at close distances or making precision shots at longer ranges, the Strikefire 2 helps you stay on target.

Durability and Reliability

When it comes to tactical optics, durability is a non-negotiable requirement. The Strikefire 2 is built like a tank, featuring a rugged aluminum housing capable of withstanding significant recoil. It’s shockproof and waterproof, allowing it to endure the recoil of powerful firearms and the harshest environmental conditions. Such durability is essential for any optic intended for professional or serious amateur use.

  • Battery Life: The Strikefire 2 is powered by a CR2 battery, and its energy-efficient design provides extended battery life. On average, you can expect thousands of hours of operation from a single battery, making it highly reliable for extended trips or range sessions. The automatic shutdown feature helps conserve battery power when the optic is not in use and quickly activates when you pick up your firearm;
  • Versatility: The ability to choose between a red or green dot and having 10 brightness levels makes the Strikefire 2 highly versatile. In bright daylight, the green dot may be more visible and comfortable for the eyes, while in low-light conditions, the red dot might be preferred;
  • Adjustable Brightness: The brightness level adjustment capability allows you to adapt to changing lighting conditions, ensuring constant visibility and reticle clarity.

User Feedback and Reviews

To provide an in-depth review of the Vortex Optics Strikefire 2, let’s examine user feedback and real-world experiences. Online reviews and forums are invaluable resources for gathering information about actual performance:

  • Many users praise the rugged construction of the Strikefire 2, stating that it can withstand intensive use and abuse;
  • Unlimited eye relief and the option to choose the dot color are often mentioned as distinguishing features, providing flexibility in various shooting scenarios;
  • Shooters highly appreciate the extended battery life, as it reduces the need for frequent battery replacements, especially during prolonged shooting sessions;
  • Some users note that the adjustment turrets could be more tactile, making precise adjustments on the fly easier.

Despite the overall reliability of the Strikefire 2, a few users have reported issues with flickering or occasional dot shutdown, although such cases appear to be rare.

Is the Vortex StrikeFire 2 Good for Hunting?

The Vortex StrikeFire 2 can be a suitable optic for you depending on the type of hunting and your personal preferences. Here are some factors to consider when determining whether the StrikeFire 2 is a good choice for hunting:

  • Game Type: The StrikeFire 2 is a red dot sight, making it well-suited for hunting scenarios where quick target acquisition is essential, such as hunting fast-moving game or varmints. It is particularly effective for hunting small to medium-sized game;
  • Lighting Conditions: The ability to switch between red and green dot colors and adjust brightness levels makes the StrikeFire 2 versatile for various lighting conditions. This adaptability can be beneficial for hunting at dawn, dusk, or in various weather conditions;
  • Durability: Hunting often involves exposure to external factors, rough handling, and potential firearm recoil. The rugged construction of the StrikeFire 2, shockproof housing, and waterproofing make it suitable for use in challenging outdoor conditions;
  • Battery Life: The extended battery life of the StrikeFire 2 is an advantage for hunters who may spend extended periods in the field. You won’t have to worry about constant battery replacement during your hunts;
  • Game and Distance: For hunting at close to medium distances, the StrikeFire 2 can be an excellent choice. However, if you plan to engage targets at longer distances, opting for optics with magnification might offer greater accuracy;
  • Personal Preferences: Ultimately, the choice of optics for hunting depends on your personal preferences. Some hunters prefer traditional magnified scopes for precise aiming, while others favor red dot sights for their speed and versatility.

It’s important to remember that the suitability of the Vortex StrikeFire 2 for hunting may depend on your specific hunting style and the type of game you pursue. If you primarily engage in close to medium-range hunting and value quick target acquisition, then the StrikeFire 2 can be a good option.

However, for long-distance shooting or specific hunting scenarios, it’s advisable to consider other Vortex Optics models or different types of scopes that better match your requirements. Always consider your needs and preferences when choosing optics for hunting to ensure a successful and enjoyable hunting experience.

How Far Can You Shoot with a Vortex StrikeFire 2?

The effective shooting distance with the Vortex StrikeFire 2 red dot sight depends on several factors, including target size, your shooting skills, the type of firearm used, and the ammunition. The StrikeFire 2 is designed for quick target acquisition and is well-suited for shooting at close to medium ranges. Here are some general recommendations for effective shooting distances with the StrikeFire 2:

  • Close-Range Shooting: For shooting at close distances, such as home defense or engaging targets at 25 yards or less, the StrikeFire 2 is highly effective. Thanks to its parallax-free design and unlimited eye relief, it’s ideal for fast target acquisition in close-quarters combat;
  • Medium-Range Shooting: The StrikeFire 2 can effectively be used for shooting at medium ranges up to 100-200 yards. This is suitable for scenarios like hunting small to medium-sized game or engaging targets in tactical situations. However, it’s worth noting that precise shots at longer distances may be challenging due to the lack of magnification;
  • Beyond 200 Yards: Beyond 200 yards, the StrikeFire 2 may not provide the level of accuracy required for long-range shooting. Without magnification, making precise shots at greater distances becomes increasingly difficult, and the dot may cover a significant portion of the target;
  • It’s important to remember that the effective range of the StrikeFire 2 can vary depending on your shooting skills and familiarity with the optic. Some experienced shooters may extend the effective range, while others may find it more comfortable within certain limits.

If you need to consistently make accurate shots at longer distances, you may consider using a different type of optics, such as a variable magnification scope, which provides the necessary magnification for precise long-range shooting.

Conclusion

The Vortex Optics Strikefire 2 is a red dot sight that excels in target acquisition, durability, and versatility. With the ability to choose the dot color, unlimited eye relief, and a rugged construction, it caters to a wide range of shooting needs, from competitive to tactical.

Despite some minor drawbacks, its overall performance and positive user reviews make it a reliable choice for those seeking dependable and effective optics.

When choosing optics for your firearms, it’s essential to consider your requirements and preferences. The StrikeFire 2 is a strong contender in this market, boasting a range of features that make it a valuable addition to your arsenal.

Burris Fastfire 3 Review: Worth the Money?

In the exciting world of compact red dot sights, the Burris FastFire III emerges as a formidable player, captivating the interest of firearm aficionados due to its remarkable adaptability across various shooting scenarios. In the following in-depth analysis, we will explore the multifaceted features and exceptional performance of the Burris FastFire III, aiming to provide a comprehensive perspective on its suitability as a valuable addition to your firearm setup.

Features:

  • Red dot sight;
  • 3 or 8 MOA options;
  • Automatic brightness sensor;
  • Very lightweight.

A Versatile Sight for Every Shooter

The Burris FastFire III isn’t just another red dot sight; it’s a versatile companion that caters to the needs of various firearm enthusiasts. Whether you’re a competitive shooter, a dedicated hunter, or someone concerned about home defense, this sight has something to offer.

One notable aspect of the Burris FastFire III is its adaptability. It can be seamlessly mounted on multiple firearms or even paired with magnified optics using Burris-supplied mounting screws with a Picatinny mount. This versatility opens up a world of possibilities for shooters, making it a valuable addition to any arsenal.

Crystal Clear Glass and Precise Reticle

  • One of the standout features of the Burris FastFire III is its exceptional glass clarity;
  • The sight’s lens is coated with index-matched Hi Loom multi-coating, ensuring a bright and clear view while eliminating glare;
  • This feature proves invaluable in low-light conditions, providing shooters with a high-performance advantage.

The Burris FastFire III presents a versatile range of reticle choices, offering shooters the flexibility to opt for either a precise 3 MOA dot or a broader 8 MOA red dot to suit their preferences and shooting conditions. Nevertheless, it’s crucial to be aware that individuals with astigmatism or those susceptible to eye strain may encounter issues such as sunbursts, flares, or distorted reticle shapes with this optic. In such instances, it might be worthwhile to consider alternative options like the red dot sights offered by Vortex, which could provide a more accommodating visual experience.

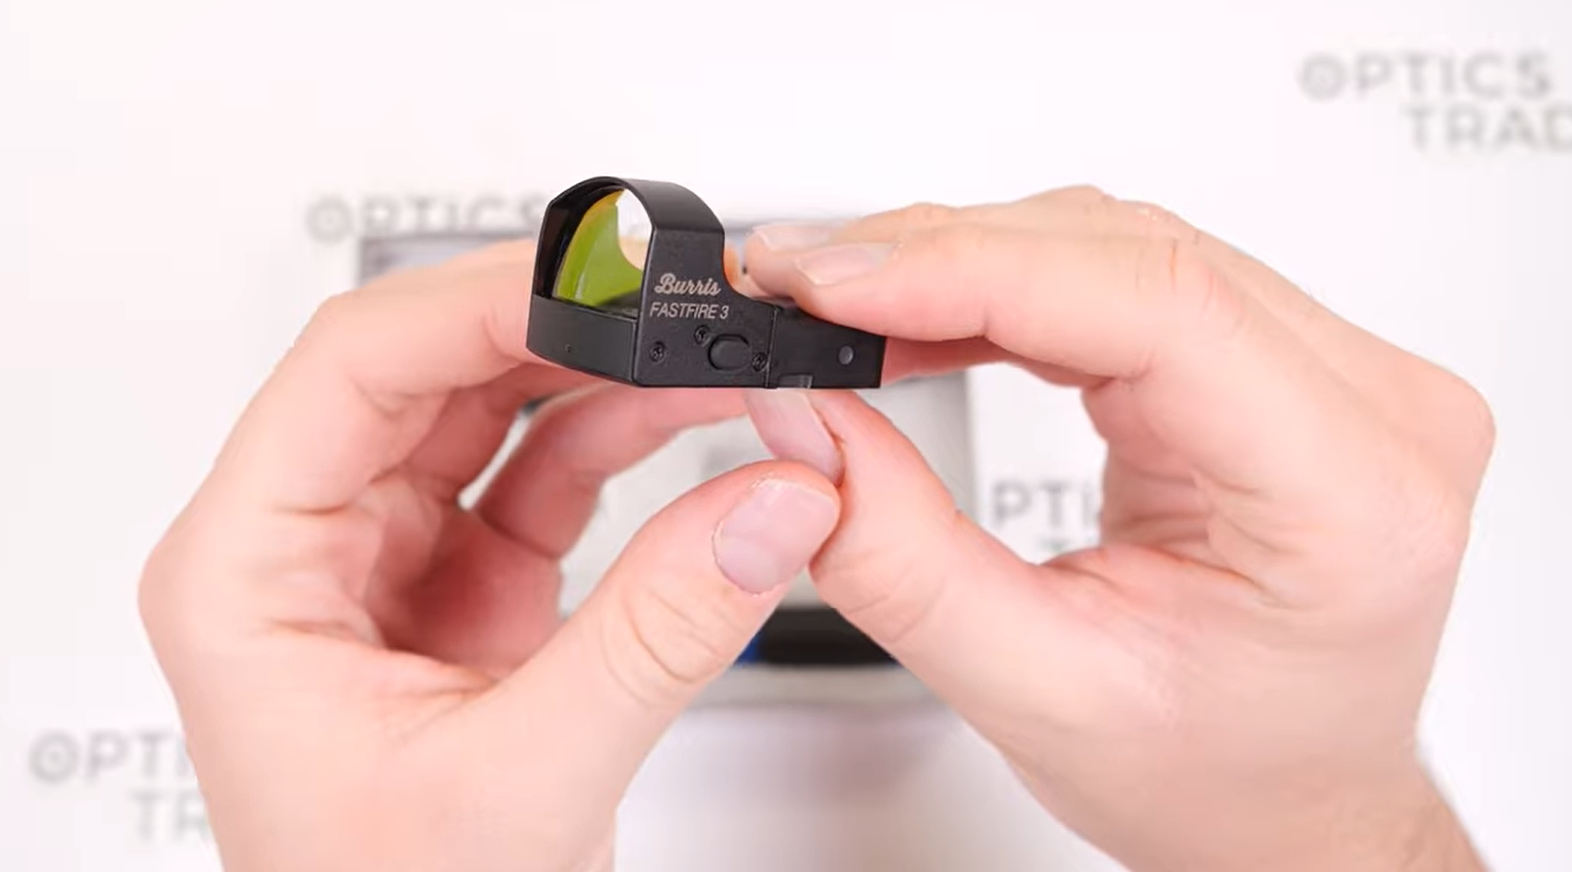
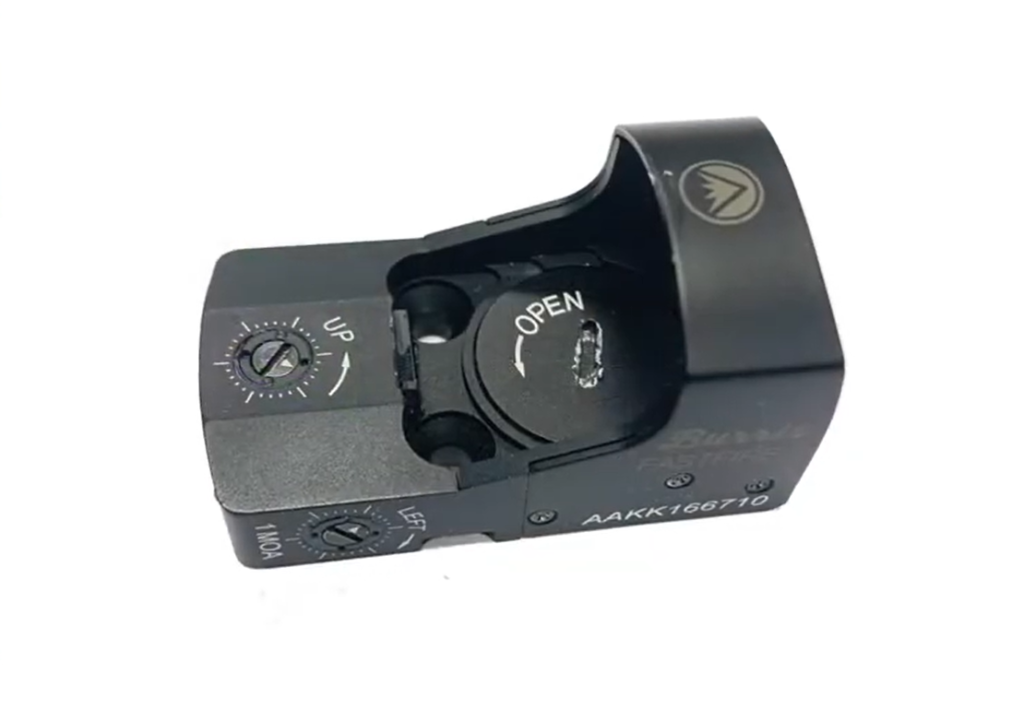
Burris Fastfire 3 on white background - words up and open on it

Adaptive Brightness Control

  • The Burris FastFire III excels in adapting to the ever-changing lighting conditions that shooters encounter;
  • Its innovative design incorporates four automatic brightness sensor settings, ensuring that the red dot sight can seamlessly transition between different environments;
  • This feature proves invaluable, particularly when moving from bright outdoor settings to dimly lit indoor spaces or vice versa;
  • The automatic adjustments are made based on the ambient light levels, guaranteeing optimal visibility of the reticle at all times. 

Moreover, for those who prefer to have more control over the sight’s brightness, the Burris FastFire III offers a user-friendly option for manual adjustment. With three distinct brightness levels to choose from, shooters can fine-tune the sight to suit their specific needs, allowing for a customized and precise shooting experience regardless of the lighting conditions they encounter.

Unlimited Eye Relief and Comfortable Shooting

The Burris FastFire III offers a delightful shooting experience with its outstanding feature of unlimited eye relief, a characteristic that’s bound to be cherished by shooters of all levels. This remarkable attribute allows users to maintain both eyes open during target acquisition, promoting quicker target tracking and heightened situational awareness. The advantage of unlimited eye relief becomes particularly evident when transitioning between different shooting scenarios, where the ability to maintain a comfortable shooting position and eye alignment is crucial.

While it’s true that the FastFire III’s viewing window for its 3 MOA dot reflex sight might appear marginally smaller when compared to some of its competitors, it’s essential to emphasize that this slight difference should not overshadow the sight’s overall performance. The compact size of the viewing window still offers an exceptional field of view and maintains precision in targeting. Ultimately, the Burris FastFire III proves that the marriage of unlimited eye relief and a slightly smaller viewing window doesn’t compromise its ability to provide an efficient and comfortable shooting experience, making it a reliable choice for a wide range of shooting applications.

Built to Last

Durability is a paramount consideration for any firearm accessory, and the Burris FastFire III excels in this regard. Despite its lightweight design, it boasts remarkable resilience against recoil and is fully waterproof. Crafted with a high-grade aluminum housing and steel construction, this sight can withstand a variety of firearm calibers, from 9mm to shotgun rounds, without shifting on its Picatinny mount.

The FastFire III’s battery life is commendable, with a single CR1632 battery providing up to 5000 hours of use at maximum brightness. While an auto-shutoff feature kicks in after 8 hours, it’s a minor inconvenience. A motion sensing “shake awake” function would have been a nice addition but isn’t a deal-breaker.

Swapping out the battery in the Burris FastFire III is a relatively uncomplicated task, mainly thanks to the conveniently located battery cap on the top of the optic. Nevertheless, some users might encounter a minor hurdle when attempting to secure the cap, particularly due to its substantial thickness or thread size. In such cases, employing a finger, coin, or screwdriver for tightening is advisable, although a degree of caution is warranted to prevent the potential for cross-threading issues.

Precise Adjustments for Accuracy

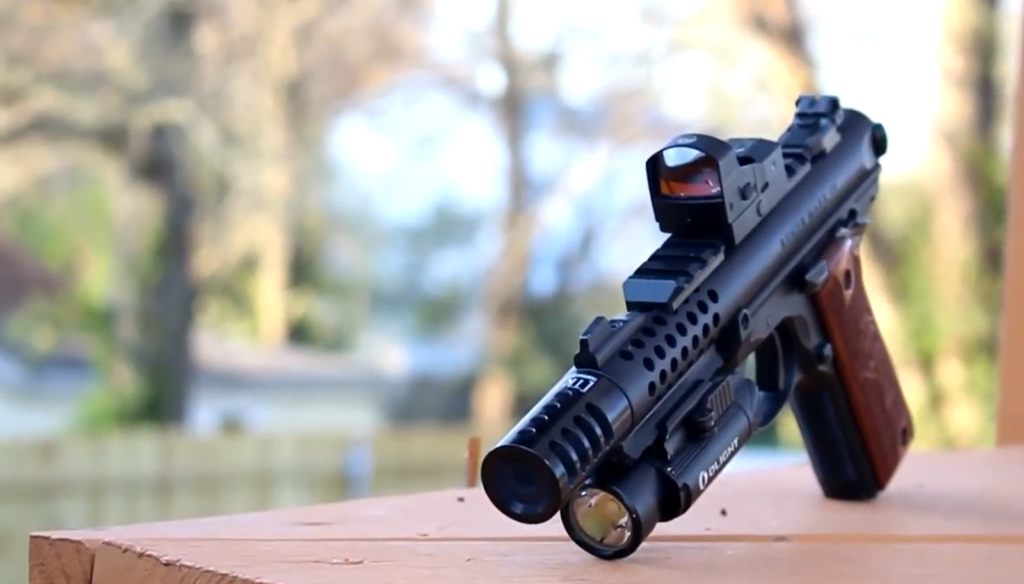
a gun with Burris Fastfire 3 on it on a wooden table outside

When it comes to fine-tuning your shots, the Burris FastFire III doesn’t disappoint. The adjustment knobs provide crisp and audible clicks when making changes on a Picatinny mount. With one MOA per click, shooters can achieve precise windage and elevation adjustments, boasting a range of +-115 MOA for elevation and +-86 MOA for windage. This level of customization ensures pin-point accuracy across various shooting distances.

Parallax-Free and Ready for Mounting

  • The FastFire III comes with a fixed 1x magnification, ensuring fast target acquisition with parallax-free performance;
  • While adding a magnifier behind the sight is possible, it may obscure a significant portion of the target due to the bright red dot’s expansion;
  • Shooters seeking magnified optics might want to explore holographic sights like the EOTECH EXPS models.

The Burris FastFire III provides a remarkable range of mounting possibilities, showcasing its versatility. Notably, it offers an optional Picatinny mount compatible with standard rail systems, enabling effortless attachment to a diverse selection of firearms. To sweeten the deal, the package includes a set of essential accessories like a screwdriver, protective cap, Torx wrench, adjusting disc, a spare battery, and a comprehensive warranty packet, thereby significantly augmenting its overall value and utility.

Affordable Excellence

One of the most compelling aspects of the Burris FastFire III is its affordability. Offering a 3 MOA dot reflex sight that rivals the performance of more expensive counterparts like the Trijicon RMR, this sight provides excellent value for money.

Pros & Cons

ProsCons
Versatile: suitable for various weapons.Not weatherproof.
Offers choice of two reticle styles for customization.No magnification for long-range shots.
Illumination system adjusts to ambient light.Slow adjustment of automatic brightness setting.
Lightweight and easy to install.Tool required for windage and elevation adjustments.
Enhances accuracy up to 100 yards.
Provides a generous field of view, ideal for urban engagements.
Red dot sight with 3 or 8 MOA options for accuracy.
Features an automatic brightness sensor for improved clarity.
Ideal for short-range shooting.

Is the Burris Fastfire 3 Reflex Sight for You?

The Burris FastFire III red dot sight caters to both seasoned shooters and newcomers, offering a reliable and adaptable solution. With generous eye relief, it ensures comfort and situational awareness for shooters of all levels. The choice between a 3 MOA dot or an 8 MOA red dot provides versatility to accommodate various preferences. Its dependable performance is further underscored by a long-lasting battery and high-quality lens coating for clarity in diverse lighting conditions. Plus, its robust build can withstand recoil and challenging weather, making it a durable choice.

While it may lack advanced features like motion sensing, the Burris FastFire III shines through consistent performance and affordability. This makes it an excellent option for shooters seeking a versatile red dot sight capable of excelling in different shooting scenarios. Whether you’re a seasoned pro or a newcomer, the Burris FastFire III promises reliability and adaptability, ensuring you’re well-equipped to handle any shooting challenge with confidence.

Conclusion

The Burris FastFire III red dot sight for 2023 proves itself as a versatile and affordable choice for firearm enthusiasts. Its adaptability, clarity, and precise adjustments make it a reliable companion for a wide range of shooting applications, from competitive shooting to home defense. While it may lack some of the advanced features of pricier optics, its impressive eye relief, durable construction, and accessible battery replacement ensure that it remains a dependable asset for those seeking a cost-effective yet high-performance red dot sight. Whether you’re a seasoned shooter or just starting, the Burris FastFire III is worth considering, offering value that’s hard to beat in the market today.

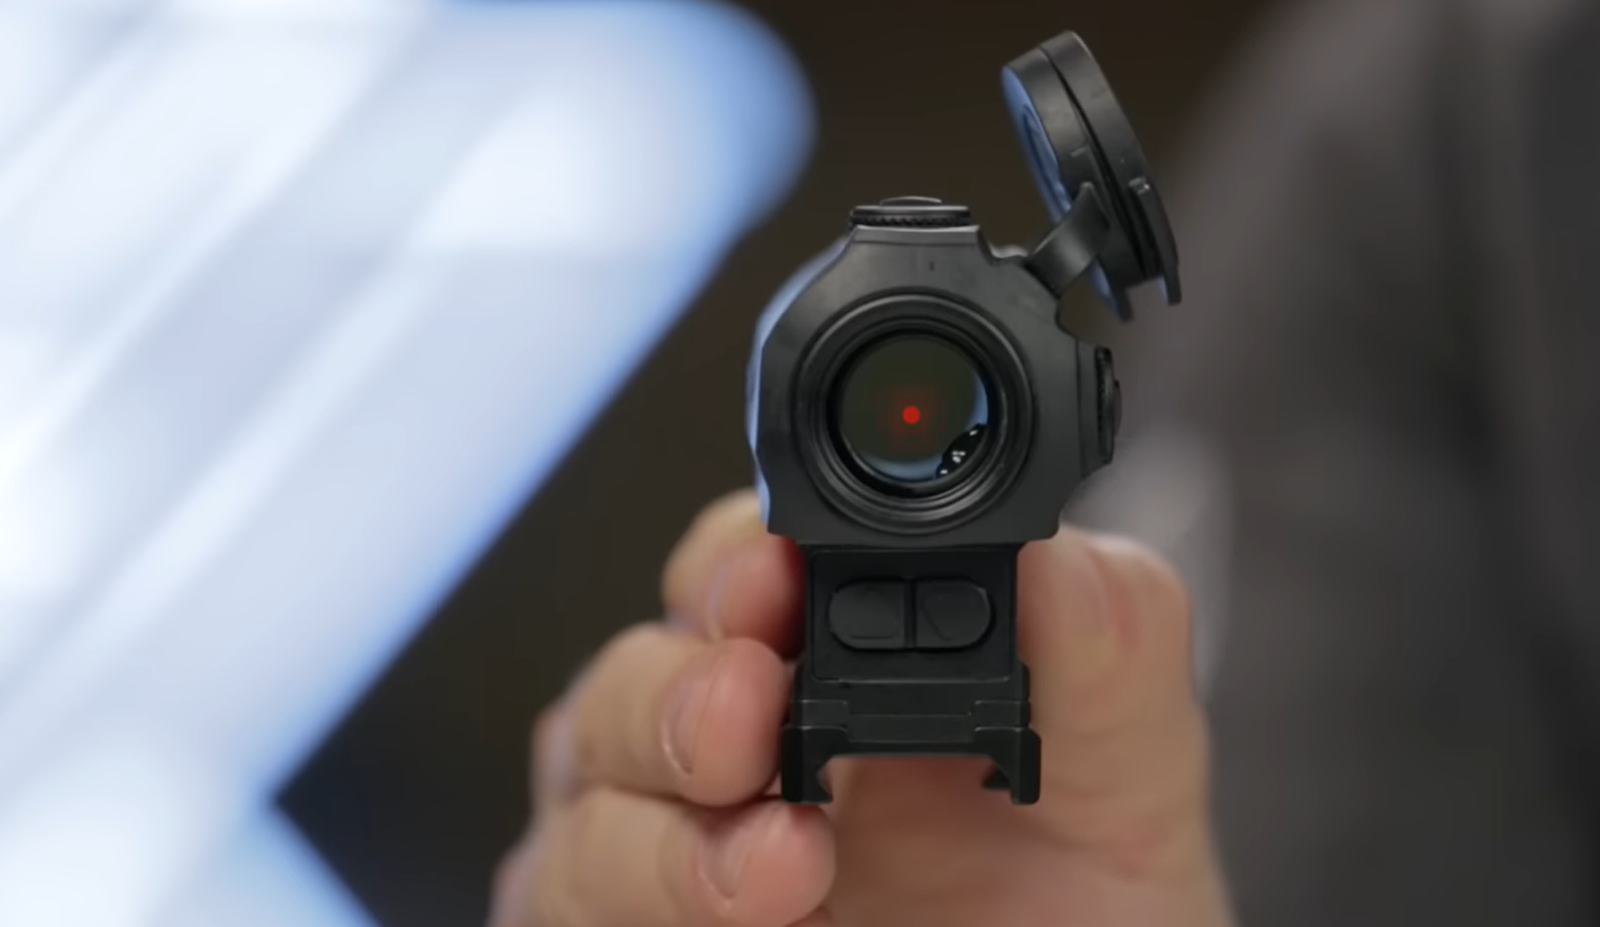
A Comprehensive Analysis of the Vortex SPARC AR

When it comes to choosing the perfect red dot sight for your firearm, you want a combination of affordability, durability, and outstanding performance. The Vortex Sparc AR checks all these boxes and more. In this in-depth review, we’ll explore why the Vortex Sparc AR has become a favorite among firearm enthusiasts and why it might be the right choice for you.

FeatureSpecification
Reticle2 MOA Red Dot
Battery Life50,000 hours
Battery TypeAAA

Who Benefits from Using a Red Dot Sight?

Red dot sights, also known as reflex sights, are tailor-made for shooters who prioritize swift target acquisition and engaging moving targets at close to medium ranges, all without the added complexity of magnification.

A defining characteristic of red dot sights is their parallax-free aiming. This means that you don’t need to align your head and eye precisely with the optics every time you aim for accurate shots. If your shooting scenarios typically involve fast-moving targets within a 200-yard range, a red dot sight is an ideal choice for you.

Before you make the decision to acquire a red dot sight, there are several crucial factors to take into consideration:

  • Battery Life: One of the most critical considerations is battery life. Unlike traditional rifle scopes, red dot sights rely on batteries, and if the battery dies, you’ll lose the aiming point. Imagine the inconvenience of your red dot failing in the midst of an expensive hunting expedition in Africa or, worse yet, during a home defense situation. It’s advisable to opt for a red dot sight with a battery that can last at least up to a thousand hours. Keep in mind that holographic sights tend to consume more power than reflex sights, so if you choose a holographic sight, it’s wise to have backup batteries on hand;
  • Dot Size: Red dot sights offer a wide variety of dot sizes to choose from. Smaller dots are favored for enhanced accuracy, while larger dots are designed for quicker target acquisition;
  • Size and Weight: Consider the dimensions and weight of the sight, as it will contribute to the overall weight of your firearm. Ideally, the size should be manageable and not overly cumbersome;
  • Housing Configuration: Red dot sights come in two primary housing configurations: open style and tube style. Open style sights provide an unobstructed field of view, which can be advantageous. On the other hand, tube-style sights encase the optics within a tube, offering increased durability and protection.
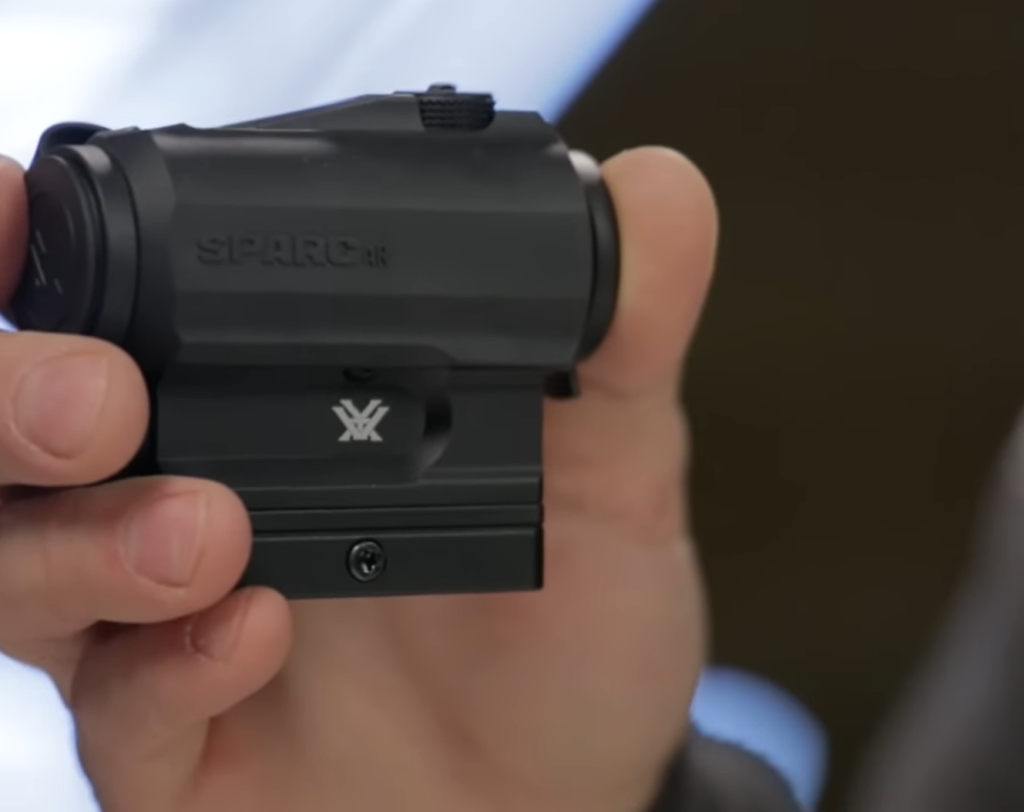
a hand holding sparc ar vortex

Overview of the Vortex Sparc AR

The Vortex Sparc AR is an improved version of its predecessor, the Vortex Sparc II. One of the standout features of the Sparc AR is its utilization of a standard AAA battery instead of the less common CR2032 battery, making it easier to find replacement batteries when needed. This change also results in a sleeker design, though it adds a bit more height to the sight. This design is particularly well-suited for AR platforms but may not be ideal for firearms where a low mount is preferred.

ProsCons
✓ Affordable✗ Protruding blob at bottom-right corner could slightly obstruct sight picture
✓ Wide elevation and windage adjustment range (90 MOA)✗ Low battery life compared to other red dots
✓ Auto shutoff in 12 hours✗ Cannot be mounted very low due to battery compartment
✓ Vortex Lifetime warranty includes electronics

Clearer Glass Quality

One of the first things you’ll notice when looking through the Vortex Sparc AR is the exceptional glass clarity. Comparing it to other popular red dot sights like the Primary Arms MD-ADS and the Sig Sauer Romeo 5, the Sparc AR stands out for its absence of any blue or dark tint. However, it’s worth mentioning that there’s a minor protruding black blob in the bottom right corner of the glass, which was used to mount the laser. While it doesn’t significantly obstruct your field of view, some users may find it slightly irritating. It’s important to note that the Vortex Sparc AR comes at a slightly higher price point compared to these other models, but its superior glass quality justifies the cost.

Versatile 2 MOA Dot

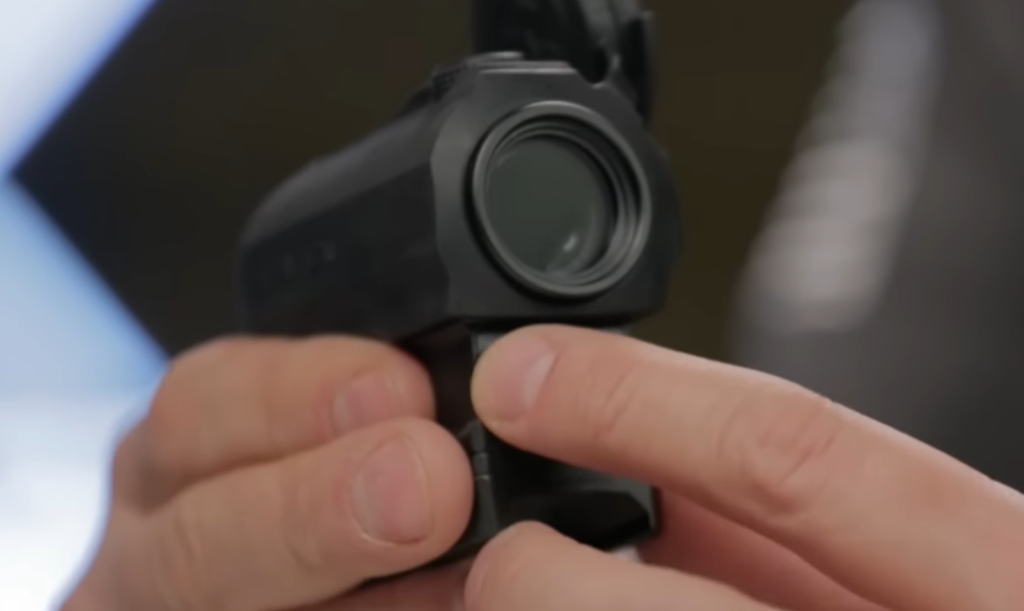
The Vortex Sparc AR features a 2 MOA (Minutes of Angle) red dot reticle, making it suitable for short to medium-range targets. With 10 brightness settings, including 2 for night vision, and 8 for daylight, this red dot sight adapts easily to various lighting conditions. The brightness adjustment buttons are conveniently located at the bottom of the sight for quick access. In most situations, brightness levels 8 and 9 are more than adequate for bright, sunny days.

Included Mounts and Battery Life

Designed specifically for AR-type rifles, as its name suggests, the Sparc AR includes a mount with a removable 3mm shim plate. This allows you to adjust for either AR absolute or ⅓ co-witness, depending on your preference. The sight’s battery life is rated at 300 hours at maximum brightness and an impressive 5000 hours at the minimum brightness setting. To prevent accidental battery drain, the Sparc AR features an automatic shut-off that activates after 12 hours of inactivity.

Tethered Lens Caps

The Vortex Sparc AR includes two tethered lens caps to keep dust and particulates away. These caps are designed to interlock with each other when not in use, ensuring they stay clear of the glass when the red dot is active. However, some users may find it challenging to snap the lens caps together with just one hand. Common solutions include removing the cap straps entirely or securing them with a rubber band.

Wide Range of Adjustments and User-Friendly Turrets

Both the elevation and windage turrets on the Sparc AR offer an impressive 90 MOA of internal adjustment. This means you’ll never run out of adjustment options, even if you mount the sight with a shim or an offset mount. Additionally, the turret caps are designed to double as screwdriver heads for making adjustments, eliminating the need to carry extra tools.

Exceptional Durability

The Vortex Sparc AR is renowned for its exceptional durability. It has passed various durability tests, including being submerged in water and frozen, as well as being thrown into the air and allowed to fall to the ground. Through all these tests, the Sparc AR maintained its zero and functionality. Some users have even tested its resilience by shooting it with a shotgun, and it continued to perform flawlessly. The icing on the cake is the Vortex Lifetime warranty, which covers not only the sight but also the electronics. This warranty surpasses the 10-year coverage offered by competitors like Aimpoint and outshines the 3-5 years of warranty provided by lesser-known brands.

Is the Vortex Sparc AR Right for You?

person holds Vortex Sparc ar in one hand, with another points at it with a finger

The Vortex Sparc AR undoubtedly offers a compelling package for firearm enthusiasts. Its affordability, combined with its impressive glass quality, versatile 2 MOA dot, and wide range of adjustments, make it an attractive option. While some users may find the minor obstruction caused by the protruding black blob in the glass and the lens caps to be potential drawbacks, these are minor inconveniences that don’t significantly affect the sight’s functionality.

If you’re looking for a reliable and durable red dot sight that fits well on AR-type rifles and offers a lifetime warranty, the Vortex Sparc AR is an excellent choice. Its battery life, while not the longest in the market, is reasonable, and the automatic shut-off feature helps conserve power. Whether you’re a competitive shooter, a hunter, or a home-defense enthusiast, the Sparc AR has the features to meet your needs.

Alternatives to Consider

While the Vortex Sparc AR stands out as a top-tier red dot sight, it’s always a good idea to explore alternatives to make an informed decision. Here are a few options to consider:

  • Bushnell Trophy TRS 25: The Bushnell Trophy TRS 25 is a budget-friendly red dot sight with a 3 MOA dot, which is larger than the Sparc AR’s 2 MOA dot. While it offers a more affordable price point, its glass quality and durability may not match up to the Sparc AR. It comes with a 1-year limited warranty, making it a suitable choice for those on a tighter budget;
  • Sig Sauer Romeo 5: The Sig Sauer Romeo 5 is a slightly cheaper alternative to the Sparc AR, offering comparable quality and durability. It features a 2 MOA dot and boasts a longer battery life of up to 40,000 hours. While its glass clarity may not be as crisp as the Sparc AR, it remains a solid option with a 5-year warranty;
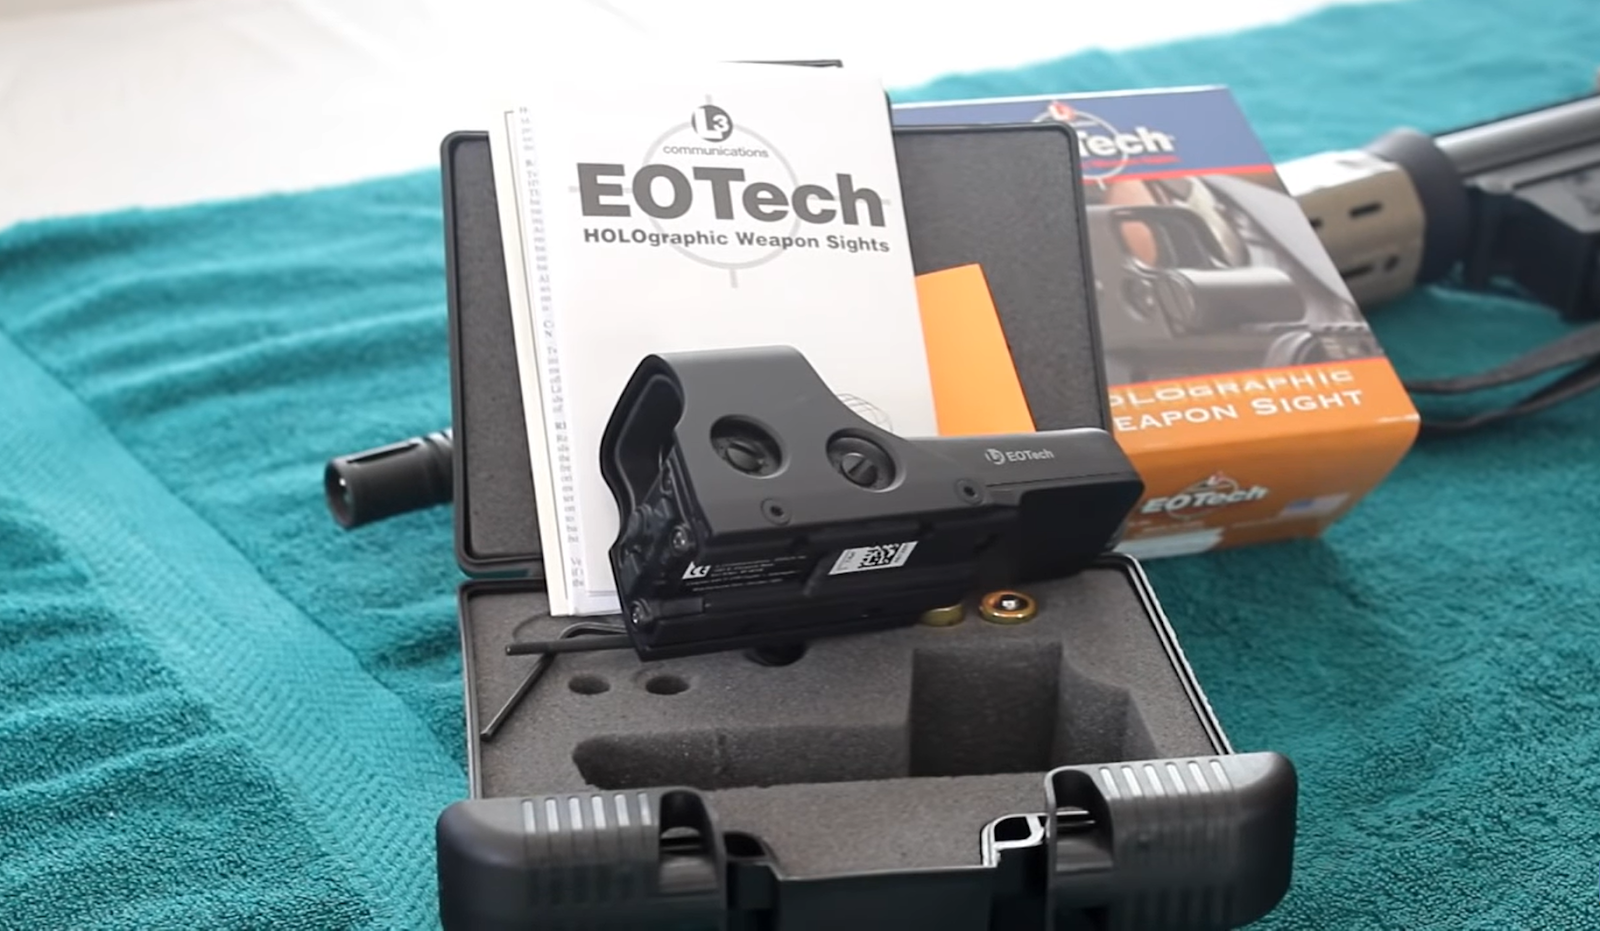
  • Eotech 512: For those willing to invest in a higher-priced optic, the Eotech 512 is a compelling choice. It features a 65 MOA ring with a 1 MOA dot reticle, offering extreme precision and fast target acquisition. Eotech is renowned for its reliability, and this holographic sight is an excellent option for short to medium-range shooting. However, it consumes batteries at a faster rate compared to red dot sights, making backup batteries essential.

Final Thoughts

Choosing the right red dot sight is crucial for enhancing your shooting experience and accuracy. The Vortex Sparc AR offers a compelling package that caters to a wide range of shooting needs. Its clear glass, versatile reticle, user-friendly turrets, and exceptional durability make it a standout choice in the market.

If you’re in the market for a dependable red dot sight that won’t break the bank, the Vortex Sparc AR is a worthy investment. Its superior performance, combined with the peace of mind offered by Vortex’s lifetime warranty, ensures that you’ll be hitting your targets with confidence for years to come.

EOTech 552 Reviews: Holographic Weapon Sight for CQB

EOTech, with a history spanning around two decades in manufacturing weapon sights, introduces its most budget-friendly model, designed to accommodate night vision compatibility. The EOTech 552, a top-tier holographic sight within its arsenal, has garnered substantial acclaim among military personnel, law enforcement officers, and government agents.

While its primary intended audience consists of those in the military and police force, the EOTech 552 sight has also gained favor among civilians. Civilian users appreciate the myriad benefits this sight offers.

Tailored for close to mid-range encounters, the EOTech 552 operates on the principles of a typical holographic sight. A laser beam projects an image, which manifests as the reticle visible to the shooter within the holographic window. In this instance, the reticle takes the form of a red dot and ring combination. The ring proves advantageous in close-quarter combat scenarios, while the dot is designed for precision in long-range engagements. The sight features user-friendly adjustment dials for windage and elevation, as well as a brightness intensity control dial for adapting to various lighting conditions.

EOTech – Pioneers in Holographic Sights

EOTech, headquartered in Ann Arbor, Michigan, has been a prominent player in the optics industry for over two and a half decades. Their mission has always been consistent: to design, develop, and manufacture optics of the highest caliber for both professional and civilian shooters.

EOTech optics are trusted by federal law enforcement agencies and military units, including the U.S. Special Forces. In fact, in 2018, EOTech was awarded a substantial $26.3 million contract from USSOCOM (U.S. Special Operations Command) to supply close-quarter optics and clip-on magnifiers.

But the appeal of EOTech extends beyond the military and law enforcement; civilian shooters can also access their quality line of holographic sights, harnessing the same cutting-edge technology and performance.

The Allure of Holographic Technology

EOTech stands as a global leader in holographic sight design. Their journey began in 1996 with the release of their first holographic sight, and since then, they’ve consistently improved scope build and technology.

Holographic technology, which underpins the EOTech 552, delivers unparalleled functionality that’s intuitive and lightning-fast—a must-have in CQB scenarios where speed-to-target is paramount. This speed is achieved through unwavering focus, thanks to the crystal-clear imaging provided by the reticle and the target.

But How Does This Technology Work?

In contrast to red dot sights that use reflected reticle systems, holographic sights record a representative reticle in 3-D space onto holographic film within the sight’s optical viewing window. The use of a laser diode and mirrors projects a holographic reticle that appears to “float” on your target, enabling simultaneous focus on both the target and reticle. This minimizes parallax distortion, a significant advantage over red dot sights that demand shifting focus between optical and target planes.

Moreover, in rugged terrain and harsh weather conditions, holographic sights like the EOTech 552 shine. While a damaged red dot sight becomes inoperable, the EOTech holographic optic continues to function even if partially shattered or obscured by mud or snow. This reliability is a key reason why U.S. Elite Forces trust holographic sights in extreme environments.

Battery Life and Beyond

One important consideration when comparing red dot and holographic sights is battery life. Holographic sights, due to their laser-based projection, consume more power than red dot sights with LEDs. However, the EOTech 552 doesn’t lag in this aspect. It offers more than sufficient battery life for multiple shooting expeditions.

Powered by two AA batteries (lithium, alkaline, or rechargeable), the EOTech 552 provides 30 brightness settings, including ten for night vision use. Even though red dots have longer battery life, the EOTech 552’s battery performance is more than adequate, ensuring you won’t be left in the dark during your missions.

Pros and Cons: Holographic Sights vs. Red Dots

Before diving into the specifics of the EOTech 552, let’s outline the advantages and disadvantages of holographic sights compared to red dot sights.

Red Dot – ProsRed Dot – Cons
Lightweight and compact.Forces the shooter’s eye to shift between optical and target planes.
Simplistic design.Parallax distortion is common.
Generally easy to use.Limited reticle options for magnification.
Longer battery life.Inoperative if the lens is damaged or obscured.
Entry-level models are affordable.Can be mounted on pistols.
Holographic Optics – ProsHolographic Optics – Cons
Exceptional speed in CQB scenarios.Bulkier and heavier than red dots (though manageable).
Reticle is projected directly onto the target, allowing simultaneous focus.Shorter battery life compared to red dots.
Significantly less parallax distortion.Higher price point.
Precise aiming with magnification.Not typically suitable for pistol mounting.
Functions well with magnifiers.Operable even with damaged front lens or obstruction.

The EOTech 552 Holographic Weapon Sight: A Closer Look

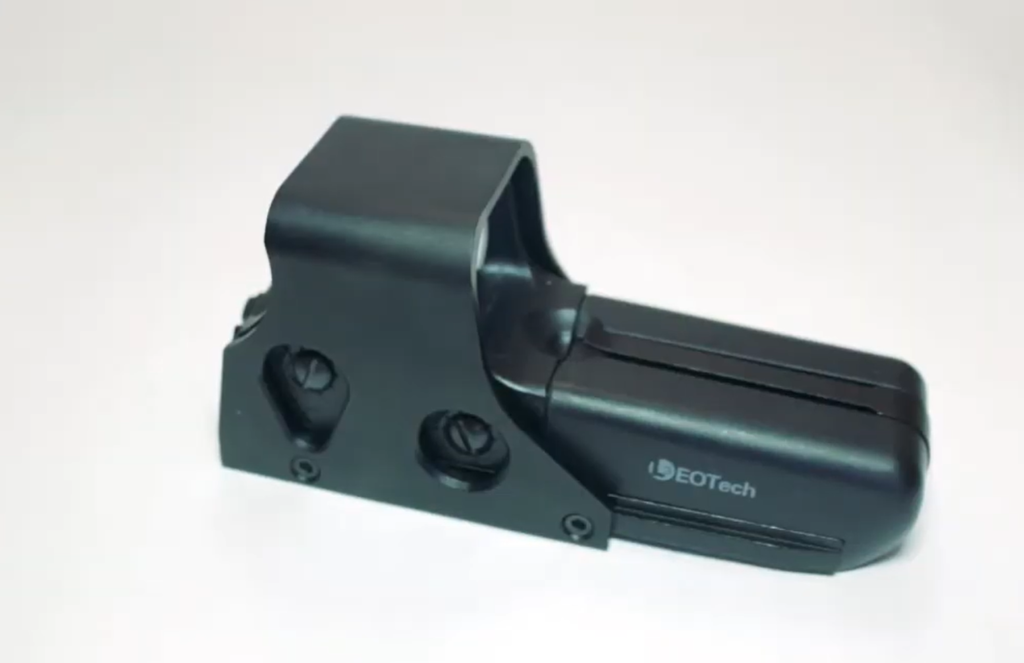
eotech 552 optics on white background

The EOTech 552, part of the 550 series of Holographic Weapon Sights (HWS), is the most popular model in its lineup. Let’s explore its exceptional features:

Built to Withstand Extreme Conditions

  • Rugged aluminum hood assembly ensures durability;
  • Shockproof construction;
  • Fog-resistant internal optics;
  • Waterproof, capable of submersion up to 33 feet;
  • Operates reliably in temperatures ranging from -4 to 122 degrees Fahrenheit.

Impressive Specifications

  • 1x fixed magnification for versatile use;
  • 0.85-inch objective lens diameter;
  • MOA adjustable with 0.5 MOA click value steps;
  • +/- 40 MOA adjustment range;
  • Linear field of view: 30 yards at 4 inches;
  • Dimensions (LxWxH): 5.6 x 2 x 2.5 inches;
  • Weighs 11.1 ounces;
  • Unlimited eye relief;
  • Compatible with 1-inch Weaver or Picatinny (MIL-STD 1913) rails.

Robust Lens Material

  • Front window: 1/8-inch solid glass;
  • Rear window: 3/16-inch Laminate;
  • Anti-Reflection coating on external optical surfaces.

Battery Performance

  • Powered by two AA batteries (lithium, alkaline, or rechargeable);
  • Offers 30 brightness settings with an easy-access scrolling feature;
  • Provides up to 1,000 continuous hours of use with lithium batteries or 600 hours with alkaline batteries;
  • Auto battery check indicator and programmable auto shut-down feature.

Reticle Options

  • Choose between the XR308 reticle designed for .308 caliber rounds with four ballistic aiming dots or the 68 MOA ring (circle) reticle with a 1 MOA aiming dot;
  • Swift reticle-on-target acquisition for rapid and accurate shot placement.

Daytime and Nighttime Versatility

  • Night Vision compatible, designed to work with Gen I to III+ night vision intensifier tubes;
  • Passive system: Emits no signature detectable by opposing night vision equipment;
  • No “bloom” when used with night vision systems;
  • 30 brightness settings for optimal visibility.

Pros and Cons of the EOTech 552

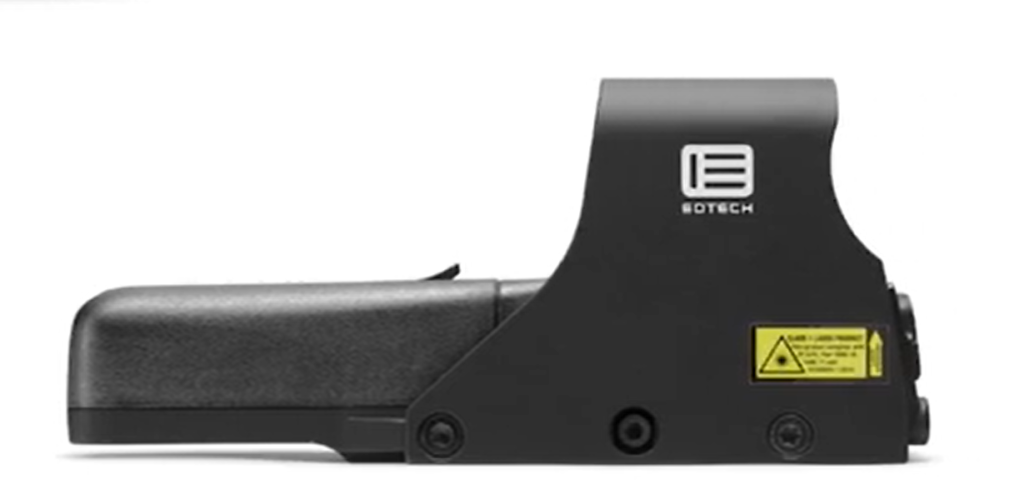
A side view of EOTech 552 on a white background

Pros:

  • Lightning-fast target identification and aiming;
  • Wide availability of AA batteries;
  • Exceptional durability and reliability;
  • User-friendly operation;
  • Professional customer service.

Cons:

  • Higher price point (but justified by quality);
  • Not suitable for all firearm applications.

Conclusion

The EOTech 552 Holographic Weapon Sight is a top-tier optic designed for close to mid-range engagements. It excels in CQB scenarios with its rapid target acquisition and consistent performance. Whether you’re a professional or a novice shooter, the EOTech 552’s ease of use and precision reticle enhance your shooting experience. With a reputation earned over two decades, EOTech’s most affordable model is also night vision-compatible, making it a versatile choice for a wide range of shooting applications.

If you’re in the market for a reliable and high-performance sight that doesn’t compromise on quality, the EOTech 552 might just be the optic you’ve been searching for. While it comes with a higher price tag, the investment is well worth it for those who demand the best in their firearms optics.

How to Reset a Scope to Factory Zero

In the world of precision shooting, the art of zeroing your scope is paramount. Whether you’re an experienced marksman or a novice just embarking on the journey of long-range shooting, the ability to reset a scope to factory zero is a fundamental skill that can make or break your accuracy. In this extensive guide, we’ll take you on a comprehensive journey through the intricate process of resetting your scope to factory zero, ensuring that your shots consistently find their mark.

The Significance of Scope Zeroing

Before delving into the intricacies of resetting your scope to factory zero, let’s first comprehend why it’s a non-negotiable aspect of precision shooting.

  • Precision and Accuracy: A correctly zeroed scope ensures that your shots hit precisely where you aim, eliminating the chances of errors due to scope misalignment;
  • Consistency: Consistency is the linchpin of excellence in shooting sports. Maintaining a consistent zero point allows you to predict the trajectory of your shots accurately under varying conditions;
  • Confidence: Knowing that your scope is precisely zeroed instills confidence in your equipment, enabling you to concentrate solely on refining your shooting technique;
  • Versatility: Zeroing your scope grants you the adaptability to make precise adjustments for different distances and environmental factors, rendering your shooting setup versatile for a myriad of scenarios.

Having established the critical role that a correctly zeroed scope plays in precision shooting, let’s proceed to the meticulous process of resetting it to factory zero.

Step 1: Gathering the Necessary Equipment

Before embarking on the zeroing journey, ensure you have all the requisite tools and equipment at your disposal:

  • Your firearm equipped with the scope to be zeroed;
  • A sturdy and stable shooting platform or rest;
  • Ammunition of the same type and grain that you intend to use regularly;
  • A target positioned at a known distance (typically 100 yards for rifles).

Step 2: Prioritize Safety

Above all else, maintaining a safe shooting environment is the paramount consideration when dealing with firearms. It is absolutely imperative that you take every necessary precaution to minimize risks. Begin by confirming that your firearm is unloaded, with the chamber and magazine both cleared of any ammunition. This fundamental step cannot be stressed enough; it forms the foundation of a secure shooting experience.

Furthermore, unwavering adherence to all firearm safety protocols is non-negotiable. These protocols include but are not limited to the four primary rules of firearm safety: treat every firearm as if it is loaded, keep the firearm pointed in a safe direction, keep your finger off the trigger until you’re ready to shoot, and be sure of your target and what is beyond it.

In addition to these basic safety measures, it’s essential to outfit yourself with proper protective gear. This includes wearing appropriate eye and ear protection throughout the entire process. These safety precautions are your shield against potential accidents and are absolutely essential when working with firearms.

Step 3: Establish the Ideal Shooting Environment

To achieve pinpoint accuracy, meticulous selection of the shooting environment is crucial. Opt for a day marked by minimal wind and stable lighting conditions. Even the gentlest breeze or shifting sunlight can significantly impact your shots and hinder the zeroing process. By carefully choosing the right conditions, you set the stage for a more successful and gratifying zeroing experience, where variables that can compromise accuracy are kept to a minimum.

man in red and black clothing and hat holding a gun and shooting,the field with grass and trees

Step 4: Securely Mount Your Rifle

In this crucial step, the focus shifts to ensuring the utmost stability and precision as you prepare to zero your rifle. To achieve this, carefully position your rifle on a robust shooting platform or rest that guarantees an unyielding foundation. The significance of this meticulous placement cannot be overstated, as any potential movement during the zeroing process can compromise the accuracy of your shots. By securely mounting your rifle, you lay the foundation for a successful zeroing procedure, minimizing variables and allowing for precise adjustments that will ultimately lead to optimal shooting performance. So, take your time to ensure that your rifle is firmly and securely positioned before proceeding further.

Step 5: Precisely Boresight Your Scope

Boresighting is the initial step, aligning your scope’s reticle with the bore of the barrel. Various methods can be employed for boresighting, including laser boresighters and the traditional “sight-through” approach. Always follow the manufacturer’s instructions for your specific boresighting tool to ensure accuracy.

Step 6: Fire Initial Shots

In this phase, you’ll want to fire a series of three to five shots at your designated target while maintaining a steadfast and controlled shooting position. These initial rounds are not just a routine exercise but rather a pivotal reference point that plays a pivotal role in assessing your scope’s present point of impact. These shots lay the foundation for the zeroing process, allowing you to gauge how far off your rifle’s aim is from the desired point. They provide essential data that will guide subsequent adjustments, ensuring that your rifle is finely tuned to deliver precise and accurate shots. So, with unwavering focus, fire those initial rounds and set the stage for a successful zeroing endeavor.

Step 7: Meticulously Adjust Your Scope

Now that you have the data from your initial shots, it’s time to make meticulous adjustments to your scope. Most scopes are equipped with turrets for elevation (up and down) and windage (left and right). Adhere to the following guidelines:

AdjustmentDirection
ElevationIf your shots are consistently hitting low, adjust the elevation turret in the “up” direction. Conversely, if they consistently hit high, make adjustments in the “down” direction. It’s imperative to make incremental adjustments and repeatedly fire until your shots consistently land at the desired point of impact.
WindageIn the case of shots deviating to the right, adjust the windage turret in the “left” direction. If shots are straying to the left, make adjustments in the “right” direction. As with elevation, make incremental changes and repeatedly fire to achieve the desired point of impact consistency.

Step 8: Refine Your Zero

  • After your shots are consistently hitting the target at your desired point of impact, take additional shots to confirm the accuracy of your adjustments;
  • Be prepared to make any necessary minor corrections to attain the utmost precision in your zero.

Step 9: Document Your Zero Data

In the journey of resetting your scope back to zero, one often overlooked but crucial aspect is meticulous record-keeping. While it might seem mundane, documenting your zero data can be the difference between consistent, accurate shots and a frustrating guessing game. Here’s why it’s so vital:

  • Zeroing Distance: Your scope’s zero point, the distance at which your shots align with your crosshairs, is like the North Star for accurate shooting. Whether you’re engaging targets at long-range or in close-quarters, knowing this distance is paramount. Keeping a detailed record of it ensures that you can swiftly return to a reliable starting point;
  • Ammunition Specifics: Ammunition isn’t just about caliber; it’s about type and grain as well. The ballistics of different ammunition can vary significantly. Documenting the specific type and grain of ammo used during your zeroing process allows you to factor in these ballistic differences for consistent shot placement;
  • Scope Adjustments: Record not only the adjustments but also the direction (elevation or windage) and the number of clicks or MOA adjustments made. This information forms a blueprint for your scope’s settings and helps you quickly return to a known point of accuracy.

But Why is All This Record-keeping Necessary?

  • It simplifies troubleshooting. If your shots start veering off target in the future, your records serve as a diagnostic tool. You can check if changes in ammunition or adjustments may be the culprits;
  • It saves you time. Imagine having to start from scratch every time you want to zero your scope. Your records provide a shortcut to the desired accuracy, especially if you’ve moved or transported your firearm;
  • It enhances your precision. Consistency is key in marksmanship. Keeping records ensures that you can recreate your zeroing process with precision, helping you maintain peak performance.

Step 10: Verify Zero at Various Distances

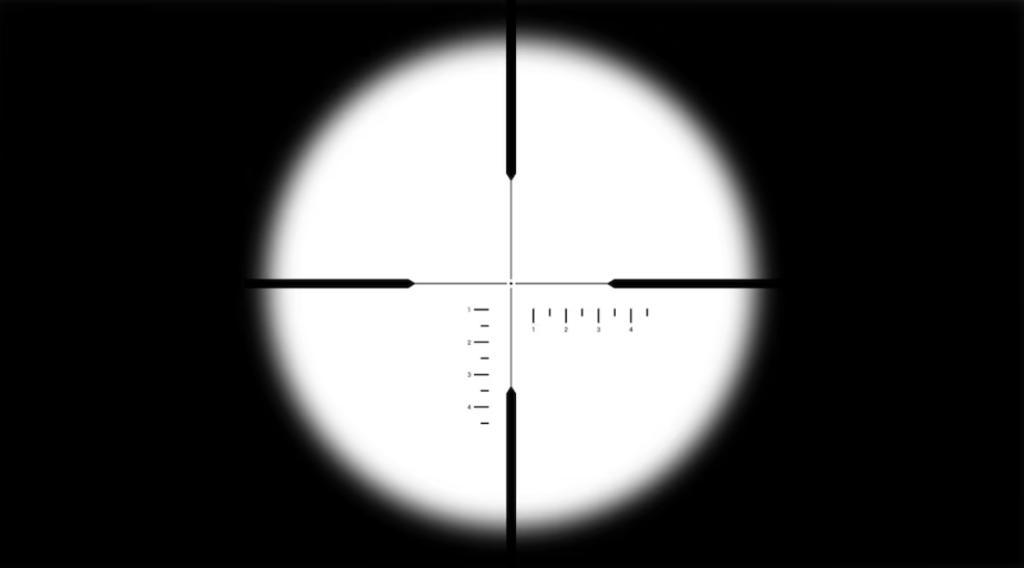
sniper crosshair look- black and white photo

To truly master the art of resetting your scope back to zero, consider taking it a step further by verifying your zero at various distances. This extra effort can take your shooting game to new heights by offering a deeper understanding of your scope’s behavior under different circumstances. Here’s why this step is essential for elevating your accuracy and versatility:

  • Real-world Adaptability: Shooting situations in the field are rarely one-size-fits-all. By testing your zero at multiple distances, you prepare yourself for the unpredictability of the real world. It’s not just about hitting a bullseye at a fixed range; it’s about being ready for any scenario that might come your way;
  • Environmental Factors: Different distances often mean different environmental conditions. Wind, humidity, temperature, and even altitude can affect bullet trajectory. Verifying your zero across distances allows you to fine-tune your scope settings for these variables, making you a more adaptable shooter;
  • Confidence Boost: Knowing that your rifle is zeroed in at various distances instills confidence. Whether you’re hunting game in varying terrains or participating in competitive shooting matches, this confidence is a game-changer. You can trust your gear to perform consistently no matter where you are;
  • Data Collection: Each verification shot at a different distance is an opportunity to collect valuable data. You can refine your knowledge of how your rifle and scope combination behaves. This data can be added to your records, further enhancing your understanding of your firearm;
  • Versatile Skill Set: Mastering different distances is a hallmark of a skilled marksman. It broadens your skill set and opens doors to various shooting disciplines. Whether you’re a long-range enthusiast or a close-quarters specialist, the ability to verify your zero across distances makes you a more versatile shooter.

Step 11: Consistent Zero Maintenance

It’s essential to bear in mind that your scope’s zero can fluctuate over time due to factors such as temperature, humidity, and usage. Regularly inspect and recalibrate your scope to ensure it retains its zero, maintaining the highest level of precision.

Conclusion

Mastering the art of resetting a scope to factory zero is a quintessential skill for any shooter dedicated to achieving precision and accuracy in their shots. By meticulously following the comprehensive steps outlined in this guide and dedicating time to practice and refinement, you will become proficient in the art of maintaining your scope’s zero and consistently hitting your targets with unwavering accuracy. Always uphold safety as the paramount concern when dealing with firearms, and abide by all safety protocols to ensure a secure and rewarding shooting experience. Best of luck on your precision shooting journey!

EOTech XPS2 Review: Enhancing Precision

In the ever-evolving world of firearms optics, the EOTech XPS2 stands out as a top choice for shooters seeking reliable and innovative sights. With its rugged design, rapid target acquisition, and parallax-free operation, the EOTech XPS2 has earned its place in the spotlight. However, for those looking to boost shooting accuracy and take their performance to the next level, pairing the EOTech XPS2 with a magnifier is a game-changer. In this in-depth guide, we’ll delve into the EOTech XPS2 and explore how adding a magnifier can elevate your shooting experience while keeping SEO optimization in mind.

The EOTech XPS2: A Closer Look

The EOTech XPS2 is a compact holographic weapon sight (often referred to as a holographic red dot sight) designed and manufactured by EOTech, a division of L3Harris Technologies. It is a popular optic choice for firearms, particularly rifles and shotguns.

History and Development

EOTech, a division of L3Harris Technologies, has a rich history dating back to the late 1990s, and they have consistently been pioneers in the field of holographic sight technology. One of their notable products, the EOTech XPS2, was introduced in 2009 and quickly gained popularity among both professional marksmen and firearms enthusiasts.

The EOTech XPS2 is known for its compact and lightweight design, making it a preferred choice for a wide range of shooting scenarios. Its expansive field of view enhances the shooter’s situational awareness, making it particularly effective in various applications. This optic is designed to excel in civilian and military settings, showcasing EOTech’s dedication to producing high-quality optics.

What sets the EOTech XPS2 apart is its continuous improvement over time. EOTech has diligently refined and enhanced the XPS2 to ensure it remains a frontrunner in holographic sight technology. This commitment to innovation and quality has solidified EOTech’s reputation as a leader in the field, making their products highly sought-after by those who rely on precision optics for their shooting needs.

Key Features of the EOTech XPS2

  • Holographic Technology: Unlike conventional red dot sights, the XPS2 utilizes cutting-edge holographic technology, projecting a precise reticle onto the target. This technology provides unlimited eye relief and eliminates parallax, facilitating quick and precise target acquisition;
  • Compact Design: The XPS2 is renowned for its compact dimensions, making it the perfect choice for firearms with limited rail space. Its streamlined design allows for co-witnessing with iron sights, providing a dependable backup option;
  • Durability: EOTech has a well-deserved reputation for crafting rugged optics, and the XPS2 is no exception. It is engineered to withstand extreme conditions, including submersion in water, and adheres to rigorous military standards for shock resistance;
  • Extended Battery Life: The XPS2 operates on a single CR123A battery and boasts an impressive battery life of up to 600 hours at the standard setting, ensuring your sight remains powered during extended shooting sessions;
  • Quick Detach Mount: Recognizing the importance of versatility, the XPS2 features a quick-detach mount that simplifies the process of removing and reattaching the sight to your firearm without compromising zero.
The magnifier eotech xps2 on the weapon - close-up view and blurred background behind it

Adding a Magnifier: The Game-Changing Combination

While the EOTech XPS2 is an exceptional optic on its own, integrating a magnifier into your setup takes your shooting experience to new heights. Here’s how:

  • Enhanced Target Identification: One of the foremost advantages of incorporating a magnifier alongside your XPS2 is the improved target identification it offers. With a magnifier in place, distant targets become more discernible and easier to distinguish, resulting in more accurate shot placement. Whether you’re engaged in long-range shooting or need to identify potential threats at a distance, the magnifier delivers a significant advantage;
  • Extended Effective Range: Shooting accurately at extended distances can be a daunting challenge, even for seasoned marksmen. The fusion of the XPS2 and a magnifier extends your effective range, allowing you to engage targets with precision at distances that might have previously seemed unreachable. This setup is particularly invaluable for hunters, competitive shooters, and law enforcement professionals who frequently encounter diverse shooting scenarios;
  • Versatility in a Compact Package: One remarkable aspect of the XPS2 with a magnifier is its ability to enhance versatility without compromising the optic’s compact design. EOTech magnifiers are meticulously engineered to seamlessly complement their holographic sights while preserving the sight’s small footprint. This means you can enjoy the benefits of magnification without sacrificing the portability and maneuverability of your firearm;
  • Swift Transition: EOTech magnifiers are designed for seamless and rapid transitions. You can effortlessly flip the magnifier in and out of your line of sight, enabling you to adapt swiftly to changing shooting conditions. This feature proves invaluable in dynamic situations where targets may appear at varying distances.

Selecting the Right Magnifier

When considering a magnifier to augment your EOTech XPS2, it’s imperative to choose one that aligns with your shooting requirements and preferences. EOTech offers several magnifier options, each with its unique features and magnification levels:

ModelMagnificationDescription
G333xThe EOTech G33 is a versatile choice with 3x magnification, known for its robust construction and quick-detach mount. It pairs seamlessly with the XPS2, offering sharp image clarity and ample eye relief.
G455xThe EOTech G45 provides 5x magnification, making it perfect for precision shooting and target identification at extended distances. It shares the same rugged build quality as the G33 and integrates seamlessly with the XPS2.
G23.FTS3xThe EOTech G23.FTS is a flip-to-side magnifier with 3x magnification, allowing effortless switching between magnified and unmagnified views. It’s an excellent choice for shooters seeking versatility in their optics setup.

When choosing the right magnifier for your XPS2, consider factors such as the shooting scenarios you frequently encounter, your budget constraints, and the overall configuration of your rifle.

Installation and Zeroing

hand holding control desk in front of the brown surface with papers and box on it

Installing a magnifier with your EOTech XPS2 is a straightforward process. Follow these steps to ensure a successful setup:

  • Attach the Magnifier: Most EOTech magnifiers come equipped with a quick-detach mount. Align the magnifier with the mount and securely fasten it in place;
  • Position the Magnifier: Confirm that the magnifier is aligned with the centerline of your XPS2 sight. This alignment is critical for preserving accuracy;
  • Zeroing: Similar to any optic, it’s essential to zero your XPS2 and magnifier combination to your firearm. Initiate the process at a known distance, typically 25 or 50 yards, and discharge a series of shots. Adjust the windage and elevation turrets on your XPS2 to bring your point of impact in line with your desired point of aim. Repeat this process until your sight is precisely zeroed;
  • Validation at Various Distances: After zeroing at your initial distance, validate your point of impact at multiple distances. This step ensures that your XPS2 and magnifier combination remains effective across diverse shooting scenarios.

Conclusion

The EOTech XPS2 is a standout holographic sight renowned for its speed, accuracy, and durability. Pairing it with a magnifier adds a new dimension to your shooting experience, improving target identification, extending your effective range, and enhancing your overall versatility. Whether you’re a competitive shooter, a hunter, or a law enforcement professional, the XPS2 with a magnifier offers a winning combination of precision and convenience.

As with any firearms optic, practice and training are key to maximizing the benefits of this setup. Regularly honing your shooting skills and familiarizing yourself with your XPS2 and magnifier will ensure that you’re prepared for any shooting scenario that comes your way. In the world of optics, the EOTech XPS2 with a magnifier is a dynamic duo that delivers unparalleled performance and versatility, making it a worthwhile investment for any shooter seeking to push their limits and elevate their precision.

Unlocking the Potential of the EOTech EXPS2-0 HWS

Delve into the fascinating world of the EOTech EXPS2-0 Holographic Weapon Optic, a tool designed for accuracy, reliability, and quick target acquisition. 

This article serves as a comprehensive guide to understanding the intricate features of this cutting-edge device, from its design nuances to its performance under various conditions.

In-depth Testing and Performance Analysis

The EOTech EXPS2-0 proves to be more than just another aiming device; it’s an exceptional experience. So, what sets it apart, and why should you consider investing in this optic? Keep reading for a detailed exploration.

Emphasis on Rapid Target Acquisition and Precision

When evaluating any optic, the metrics differ from person to person. Some focus on affordability, while others look for a feature-rich experience. Among military professionals and law enforcement, EOTech’s offerings have long been a preferred choice, and their civilian market is also expanding. The EOTech EXPS2-0 is particularly lauded for:

  • Quick Target Engagement: Designed for speed and efficiency in placing your first round accurately;
  • Enhanced Visibility: Enables two-eyes-open shooting, facilitating better situational awareness;
  • Rapid Target Identification: Ensures quick and accurate target acquisition in various scenarios.

Packaging and Compact Design

The EXPS2-0 arrives protected in a robust plastic clamshell, which is effective in shielding the device from potential shipping hazards. Upon unboxing, one notices the compact footprint of this optic, setting it apart from predecessors like the 512 and 552 models. 

EOTech has ingeniously:

  • Conserved Rail Space: Opted for a transverse-mounted CR123 battery, creating extra room on the mounting rail;
  • Enhanced Battery Life: Integrated two auto-off settings to extend battery life to around 600 hours at default brightness;
  • Intuitive Design: Provided an automatic reticle “pulse” to warn when the battery life drops below 20%, indicating limited usage time remaining.

Optical Performance and Viewing Experience

What immediately stands out is the generous size of the device’s flat-glass and laminate viewing window, featuring an anti-glare coating. Specifics include:

  • Viewing Dimensions: Measures 1.2″ x 0.85″, making your backup iron aiming devices visible and functional without removing the optic;
  • Field of View: Offers 30 yards of viewable space at 100 yards with four inches of eye relief;
  • Co-witnessing Limitations: While nearly perfect, the EXPS2-0 sits slightly too low on a flat-top AR to completely co-witness with standard iron aiming devices.

Versatility in Lighting Conditions

The EXPS2-0 is designed to adapt to variable lighting situations:

  • Adjustable Brightness: Comes with 20 settings, allowing you to tailor the device for dawn, dusk, or high-noon conditions;
  • Clarity: Ensures a crisp and clear view, even in the harsh conditions of the Arizona desert.

While the EXPS2-0 is not compatible with night vision (NV), those requiring NV features can opt for the EXPS3-0 model at a slightly higher price point.

In summary, the optic excels in design, durability, and functionality, making it an exceptional choice for a wide range of users—from novices to professionals.

On Reticle Options and Precision 

The customary aiming pattern in the EXPS2-0 involves a 65MOA ring complemented by a precise 1MOA dot. Alternatively, a model exists with a second 1MOA dot (EXPS2-2), which allows for a dual zeroing system to tackle targets at varying distances. The 65MOA ring simplifies rapid target locking in close-quarters scenarios. 

Just encircle the objective within the ring and engage the firing mechanism for a quick and effective hit. The genuine 1MOA dot proves invaluable for high-precision firing, as it covers approximately one square inch of the target at a distance of 100 yards, providing a high degree of accuracy for your rounds.

Performance Metrics and Comparisons 

Field testing at Gunsite’s Scrambler revealed noteworthy enhancements in on-target speed and precision when using the EXPS2-0. Even under varying shooting positions, it was observed that the time to hit eight targets from eight stations exceeded the established benchmark by less than two seconds. The 1MOA dot further confirmed its efficacy, offering impeccable accuracy within one square inch of the target at 100-yard distances.

Compatibility and Attachments 

This holographic aiming device blends seamlessly with modern sporting rifles. It can be effortlessly affixed to MIL-STD-1913 or 1-inch Weaver rails and even accommodates varying rail widths. The quick-release lever ensures uncomplicated attachment and detachment while maintaining excellent zeroing consistency. 

According to manufacturer claims, the aiming device sustains its accuracy to within 2MOA even after multiple attachments and removals.

Innovations and Usability 

Addressing previous concerns from users of similar aiming systems, significant upgrades have been made to the EXPS2-0. Instead of the typical battery cap and latch of older models, this one boasts an O-ring sealed cap, tethered to the device’s body, offering enhanced sealing and no risk of losing components. By opting for a transverse-mounted CR123 battery, it only occupies 2.75 inches of rail space, leaving ample room for additional accessories like a magnifying scope.

Eye Relief and Adjustability 

This device provides unlimited eye relief, offering a versatile placement range along the weapon’s rail without compromising the quality of the sight picture. Adjustments can be made at 1/2MOA intervals with a spent cartridge or a coin. 

This dual-purpose tool also allows for battery compartment access and adjustments to the quick-release lever width settings. This level of convenience in mounting, unmounting, and adjustments adds significant value to the device.

Justifying the Investment 

The cost of premium aiming systems, like the EXPS2-0, often raises eyebrows. However, comparing these high-end optics with their budget counterparts shows a stark difference, akin to the experience of transitioning from DVD to Blu-Ray or SD to HD TV. The level of quality is palpable only when one experiences it firsthand.

Choosing this high-end aiming system depends on the intended use of the weapon. For recreational target practice, budget optics may suffice. However, for engaging targets at both short and long distances effectively and rapidly, the EXPS2-0 clearly marks its territory as a superior choice.

Technical Specifications of the EXPS2-0 Holographic Aiming Device:

  • Weight: This aiming device weighs in at 11.2 ounces, making it an optimal choice for maintaining rifle balance;
  • Dimensions: With a length of 3.5 inches, it requires just 2.75 inches of rail space for installation;
  • Zoom Capability: It features a 1x magnification, ideal for close to medium-range target engagements;
  • Type of Optics: Utilizes parallax-free transmission holography, providing a crisp and accurate reticle;
  • Eye Comfort: Offers unlimited eye relief for flexible positioning and comfort;
  • Range of Adjustability: It comes with a +/- 40 MOA adjustment range;
  • Incremental Adjustments: Each click adjusts by 1/2 MOA, equivalent to 1/2 inch at 100 yards;
  • Resilience: The device is submersible up to 10 feet and can withstand temperatures ranging from -40 to 150 degrees Fahrenheit;
  • Compatibility: Designed to mount on a 1-inch Weaver or MIL-STD-1913 rail system;
  • Power Source: Employs a CR123 Lithium battery;
  • Battery Longevity: Boasts up to 600 hours of continuous usage on brightness setting 12;
  • Market Price: The Manufacturer’s Suggested Retail Price (MSRP) stands at $559, though street prices hover around $500.

Evaluations Based on Key Aspects:

  • Clarity in Optics: The unit features a true-flat 1/8-inch solid glass front and a 3/16-inch shatter-resistant laminate at the back. Anti-glare coatings and fog-proof sealing contribute to a remarkably clear visual field;
  • Ergonomics and Functionality: A robust construction coupled with intuitive controls makes target acquisition swift and effective. Weatherproofing features like water and fog resistance ensure uncompromised performance across varying environmental conditions;
  • Feature Set: Although the device doesn’t offer co-witnessing with standard iron aiming devices, it still provides an adequate sight picture through its lens. The choice of reticle is specific but efficiently serves its intended purpose;
  • Overall Appraisal: The EXPS2-0 shows exceptional performance, low maintenance, and heightened accuracy over traditional iron aiming devices. However, it does lose half a star for its inability to align perfectly with iron aiming devices.

Ideal Use-Cases for the EXPS2-0

  • Law Enforcement: In tactical scenarios where seconds count, the speed and accuracy of this holographic device could make a crucial difference;
  • Sport Shooting: For competitive shooters, the quick target acquisition feature and robust construction are advantageous;
  • Hunting: With its weatherproof features, it performs reliably in outdoor conditions, making it a good choice for hunting trips;
  • Home Defense: For those looking for an aiming device for home defense, the user-friendly design and durability are significant pros.

Comparing Holographic Devices and Traditional Aiming Systems:

  • Reticle Clarity: Holographic devices generally offer more vivid and clear reticles than their red-dot counterparts;
  • Battery Life: Traditional aiming systems often have a longer battery life, but the EXPS2-0 does provide an impressive 600 hours;
  • Price Range: While holographic devices can be costlier, their quick target acquisition and accuracy often justify the price for serious users;
  • Weather Resistance: Unlike many red-dot scopes, this holographic device comes with advanced weather-resistant features.

Conclusion

The EXPS2-0 Holographic Aiming Device proves to be an exemplary addition to any modern firearm setup, blending high functionality with a robust design. While it doesn’t offer co-witnessing with standard iron aiming systems, its range of features and specifications more than makeup for this limitation. 

From its parallax-free optics to its high level of resilience against environmental factors, it serves as a versatile choice for a wide array of shooting needs. Its high market price is justified by its exceptional durability, ease of use, and the tactical advantage it offers in various scenarios, from law enforcement to sport shooting and home defense.

Mastering Precision Shooting with Red Dot Sights

If you’re new to shooting with a red dot sight or looking to enhance your skills, this comprehensive guide will walk you through the fundamentals, tips, and techniques for achieving accuracy and precision. Red dot sights have gained immense popularity among shooters due to their rapid target acquisition and ease of use. Whether you’re a competitive shooter, a hunter, or a tactical enthusiast, mastering the art of shooting with a red dot sight can significantly improve your shooting performance.

Understanding Red Dot Sights

Before delving into shooting techniques, let’s understand what red dot sights are and how they work. Red dot sights, often referred to as reflex sights, provide shooters with a non-magnifying illuminated aiming point, commonly a red dot or reticle. These sights are designed to be parallax-free, meaning the point of aim remains on target regardless of the shooter’s eye position.

Mounting Your Red Dot Sight

Properly mounting your red dot sight is essential for accuracy. Ensure it is securely attached to your firearm’s rail or mount. Use the appropriate tools and follow the manufacturer’s instructions for installation. Once mounted, co-witness your iron sights if applicable, as this provides a reliable backup aiming option.

Zeroing Your Red Dot Sight

Zeroing, or sighting in, your red dot sight is a crucial step. It ensures that your point of impact matches your point of aim. To zero your red dot sight:

  1. Select a Stable Shooting Position: Choose a stable shooting platform, such as a shooting bench or sandbags, to eliminate unnecessary movement;
  2. Set an Initial Distance: Start at a reasonable distance, typically 25 yards for rifles and 10 yards for handguns;
  3. Fire Three-Shot Groups: Aim at a specific target point and fire three-shot groups. Pay attention to where your shots land;
  4. Adjust Windage and Elevation: Using the sight’s adjustment turrets, move the red dot to match the center of your shot groups;
  5. Repeat as Necessary: Fire additional groups and make adjustments until your shots consistently hit the desired point of impact.

Shooting Techniques

Now that your red dot sight is zeroed, it’s time to explore shooting techniques:

  1. Target Focus: Unlike traditional iron sights, focus on the target rather than the red dot. The dot should naturally align with your target;
  2. Both Eyes Open: Keep both eyes open when aiming. This allows for better situational awareness and faster target acquisition;
  3. Steady Sight Picture: Maintain a steady sight picture by controlling your breathing and trigger squeeze. A smooth, gradual trigger pull is essential;
  4. Follow-Through: After each shot, maintain your sight picture and follow through. This ensures accurate shots and quick follow-up shots if necessary.

Advanced Tips

For advanced shooters, consider these tips:

  • Transitions: Practice transitioning between multiple targets swiftly. The red dot’s speed is a significant advantage in dynamic shooting scenarios;
  • Reticle Selection: Experiment with different reticle options if your red dot sight allows it. Some shooters prefer different shapes or patterns for specific situations;
  • Zero Offset: Consider a lower 1/3 co-witness or an offset red dot mount for quicker target acquisition and peripheral vision;
  • Maintain Your Sight: Keep your red dot sight clean and ensure the lens is free from debris and smudges.
A man shoots a shotgun

Comparison Table 

FeatureRed Dot SightTraditional Iron Sights
Target AcquisitionRapid and intuitiveRequires aligning front and rear sights
Aiming PointIlluminated dot or reticleFront and rear sights
MagnificationTypically 1x (no magnification)No magnification
Parallax-FreeYesLimited, may have parallax
Eye ReliefUnlimited (both eyes open)Requires precise eye alignment
Field of ViewWider field of viewLimited field of view
Low-Light PerformanceExcellent in low-light conditionsRequires ambient light
Rapid Target TransitionQuick target transitionsSlower target transitions
Learning CurveShort learning curveLonger learning curve
Backup Sighting OptionCo-witness with iron sightsN/A

This table provides a quick overview of the primary differences between red dot sights and traditional iron sights, helping shooters make an informed choice based on their preferences and shooting needs.

Additional Tips for Red Dot Sight Shooting

Here are some additional tips to enhance your shooting skills with a red dot sight:

  1. Maintain a Consistent Cheek Weld: Ensure your cheek consistently contacts the stock or cheek riser when aiming through the red dot sight. This helps maintain proper sight alignment and eye relief;
  2. Practice Shooting Positions: Experiment with different shooting positions, including standing, kneeling, and prone. Familiarize yourself with shooting from various stances to adapt to different shooting scenarios;
  3. Use Correct Mounting Height: Ensure your red dot sight is mounted at the appropriate height for co-witnessing with iron sights or aligning with your eye. Proper mounting height ensures quick target acquisition;
  4. Stay Focused on the Target: When using a red dot sight, keep your focus on the target, not the dot itself. The dot should appear as a crisp, clear point on the target. This helps with accuracy and speed;
  5. Keep Both Eyes Open: Shooting with both eyes open allows for better situational awareness. It helps you maintain peripheral vision and quickly transition between targets;
  6. Regularly Check Zero: Red dot sights may require periodic adjustments to maintain zero. Regularly check and recalibrate your sight to ensure consistent accuracy;
  7. Practice Rapid Target Transitions: Set up multiple targets at the range and practice quickly transitioning between them. This improves your ability to engage multiple threats effectively;
  8. Consider a Magnifier: For longer-range shots, consider adding a magnifier behind your red dot sight. This can provide magnification when needed without sacrificing the benefits of the red dot sight for close-quarters shooting;
  9. Stay Informed: Keep up-to-date with the latest advancements in red dot sight technology and shooting techniques. Attend training courses and seek advice from experienced shooters;
  10. Safety First: Always prioritize safety when handling firearms. Ensure your red dot sight is securely mounted, and follow firearm safety rules at all times.

By incorporating these tips into your shooting practice, you can maximize the benefits of your red dot sight and become a more proficient shooter. Remember that consistent training and practice are essential for improving your shooting skills.

Video Explanation 

To finally answer all your questions, we suggest you watch this video. Enjoy watching it!

Conclusion 

In conclusion, shooting with a red dot sight can significantly improve your accuracy and target acquisition speed. By following the steps outlined in this guide, you can master the art of using red dot sights effectively, whether for hunting, competitive shooting, or self-defense.

Remember that practice is key to becoming proficient with a red dot sight. Spend time at the range, experiment with different settings, and adapt your shooting techniques to get the best results. Over time, you’ll develop the muscle memory and skills needed to shoot with precision.

FAQ

1. Are red dot sights suitable for all types of firearms?

Red dot sights are versatile and can be used on various firearms, including pistols, rifles, and shotguns. However, it’s essential to choose a red dot sight model that matches the firearm’s intended use.

2. Do red dot sights work in low-light conditions?

Yes, many red dot sights are designed to work well in low-light conditions. Some even have night vision compatibility. Check the specifications of the specific red dot sight you’re interested in to ensure it suits your needs.

3. What is the battery life of a typical red dot sight?

Battery life varies depending on the red dot sight model and the brightness setting used. On average, many red dot sights can last thousands of hours on a single battery. Some advanced models offer significantly longer battery life.

4. Can I co-witness iron sights with a red dot sight?

Yes, many red dot sights are designed to co-witness with iron sights. This allows you to use either the red dot sight or the iron sights, providing added flexibility in various shooting scenarios.