Mastering the Art of Aligning and Calibrating Iron Sights

In a world increasingly enamored with sophisticated scopes and digital optics, the timeless iron sights often go unnoticed. Yet, their reliability and durability make them invaluable, especially as a backup sighting system. 

Ensuring they are precisely aligned and calibrated is essential, not only for shooting accuracy but also for effective self-defense and safe firearm use. This comprehensive guide sheds light on the nuances of aligning and fine-tuning iron sights to achieve optimal performance.

Aligning and Calibrating Iron Sights

Some marksmen favor calibrating at 25 meters, while others opt for a 50-yard alignment. Certain scenarios might even require an alignment at 100 yards, but it’s crucial to consider how this impacts shorter-range accuracy. For this guide, the focus will be on a 50-yard alignment, often considered a happy medium.

Factors to account for:

  • Bench-Rest Quality: If grouping is inconsistent, assess the stability of your bench rest. It should provide ample support and eliminate extraneous variables that could affect your shooting;
  • Skill Level: For novices struggling to maintain a tight group, a qualified gunsmith’s expertise might be beneficial for initial alignment. Following that, consistent practice is key to improvement;
  • Elevation and Windage: If attaining the perfect alignment is challenging, break down the process. Start by focusing solely on either elevation or windage adjustments. Complete a three-round group, make the necessary changes, and then proceed to the other;
  • Initial Proximity: Should the sights be grossly misaligned, to the extent that shots are missing the paper target, begin at a closer distance like 10 yards. Attain basic alignment at this range before incrementally moving out to 25 and then 50 yards.

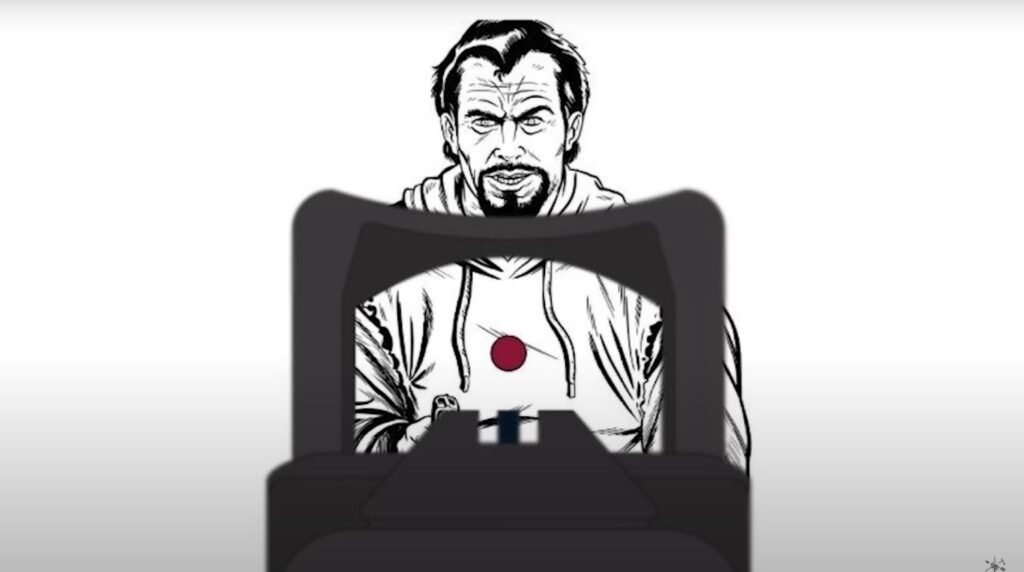
Point of Aim vs. Point of Impact

The two key terms in the realm of firearm alignment are Point of Aim (POA) and Point of Impact (POI). The POA refers to the target as seen through the aligned sights, whereas the POI signifies where the bullet makes contact with the target. The objective is to align the POA and POI as closely as possible.

Decoding the Anatomy of Iron Sights

Different firearms feature varying types of iron sighting systems. The alignment process can differ considerably depending on the model and make of the firearm. For instance, AK series rifles predominantly use the rear sight for elevation adjustments, while the AR series employs the front sight. 

It’s crucial to comprehend which sight—front or rear—controls elevation and windage before making any adjustments.

Calibrating Elevation

Should your firearm rely on the front sight for elevation tweaks, you’ll need to adjust it in the direction opposite to where you want the Point of Impact to move. For example, if shots are hitting below the intended target, the front sight should be lowered.

Properly aligned iron sights are an underestimated asset in any shooting arsenal. While often overshadowed by more modern optics, their simplicity, reliability, and effectiveness in different conditions make them invaluable.

Understanding how to precisely calibrate them can significantly improve shooting proficiency, irrespective of whether they are the primary sighting system or a backup. This guide aims to equip you with the knowledge and tools to perfect this essential skill.

Fine-Tuning Vertical Alignment

To lower the Point of Impact (POI), elevate the front sight. Conversely, if the rounds hit above the intended mark, lifting the front sight will effectively lower the POI. If it’s the rear sight that controls vertical alignment, remember that moving the rear sight in the same direction as the desired POI will yield accurate results. 

For instance, if a round lands higher than targeted, lowering the rear sight should rectify this discrepancy.

Calibrating Horizontal Alignment

When the front sight is responsible for horizontal (windage) alignment, the principle remains the same. For example, if the shot strays to the left, shifting the front sight to the left will move the POI toward the right. 

However, if it’s the rear sight that controls windage, simply move it in the direction you wish the POI to go. If a round misses to the left, moving the rear sight to the right should align the POI with your intended target.

Preliminary Research Before Testing

Before hitting the shooting range, it’s crucial to understand the specifics of sight alignment for your particular firearm. A plethora of resources can assist in this, from user manuals to military guidelines and online video tutorials. Knowing the details of your firearm’s sight system is paramount to making effective adjustments.

Ensuring Proper Sight Alignment

Correct sight alignment is the cornerstone of accurate shooting. With open sights, the aim is to position the front sight equidistantly between the two posts of the rear sight assembly. The tops of the front and rear sights should form a straight line. 

For peep sights, it’s crucial to center the front sight in the middle of the rear peep sight as precisely as possible. Firearms like the AR, Scorpion, and HK long guns offer multiple peep sight dimensions to aid in precise aiming.

Fundamentals of Calibrating Metal Sights

Once a basic understanding of metal sight usage and shooting technique is attained, it’s time to calibrate or ‘zero’ the firearm. Various elements, such as firearm type, caliber, and the intended use, will influence the appropriate distance for calibration. For instance:

  • Rifles: Understanding the ballistics of a particular round can be beneficial. Various platforms offer Battle Sight Zeroes (BZOs) such as a 50/200 yard zero for an AR-15, enabling accurate shots between 25 and 200 yards;
  • Handguns: Typically, a distance between 15 to 25 yards is optimal for self-defense purposes.

Selecting an Appropriate Target

Although there are targets specifically designed for calibrating certain types of firearms like AR-style rifles, they are not obligatory. A large, conventional bullseye or grid-type target usually suffices. 

Some prefer multi-bullseye targets, offering a central bullseye surrounded by others in each corner. This design allows for easy adjustments without the need to change the target, especially useful if initial attempts are far from the intended mark.

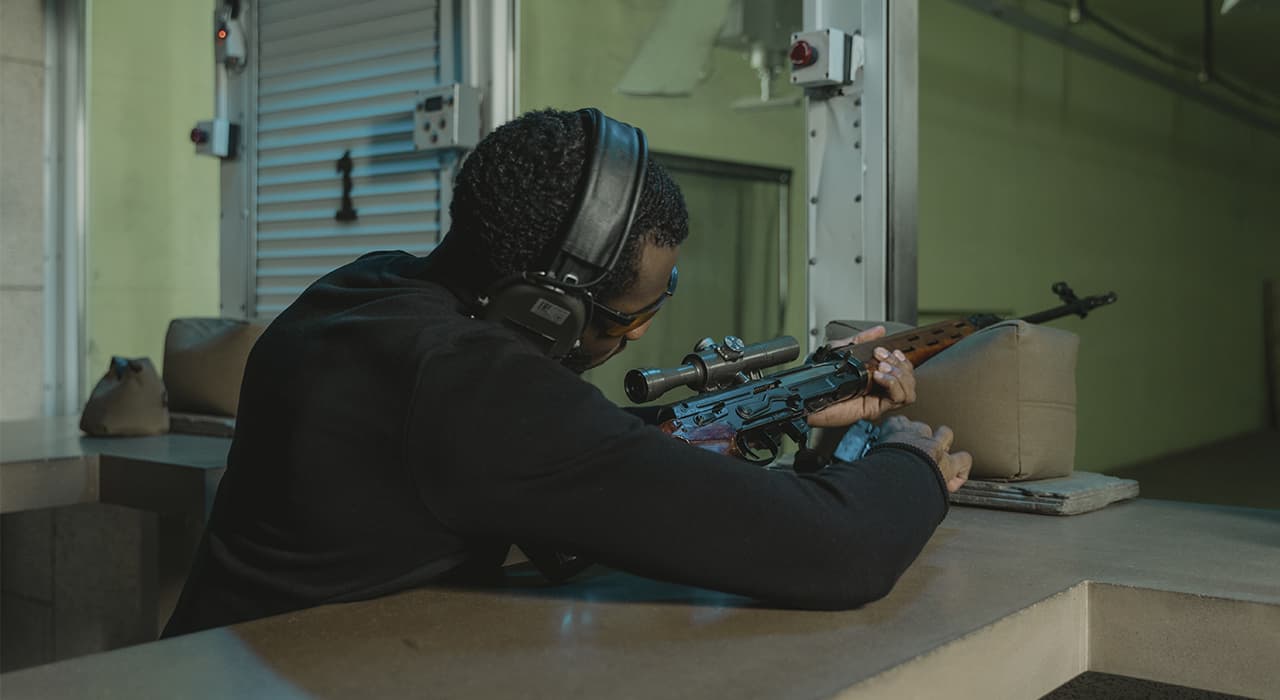
Stabilizing Your Firing Stance

Accurate shooting demands a stable platform for launching projectiles. When using a rifle, the prone position offers an advantageous base. You can enhance stability by employing a bipod or using makeshift supports like sandbags or backpacks. Alternatively, seated shooting at a bench can also yield satisfactory results. The primary goal is to mitigate movement that could throw off your aim.

For handguns, the dynamics are somewhat different. A prone position doesn’t generally offer substantial benefits. However, seated shooting, especially when utilizing a specially designed bench, can facilitate a more stable shooting position for handguns. You can rest your shooting arm on the bench for more consistent aim and recoil management.

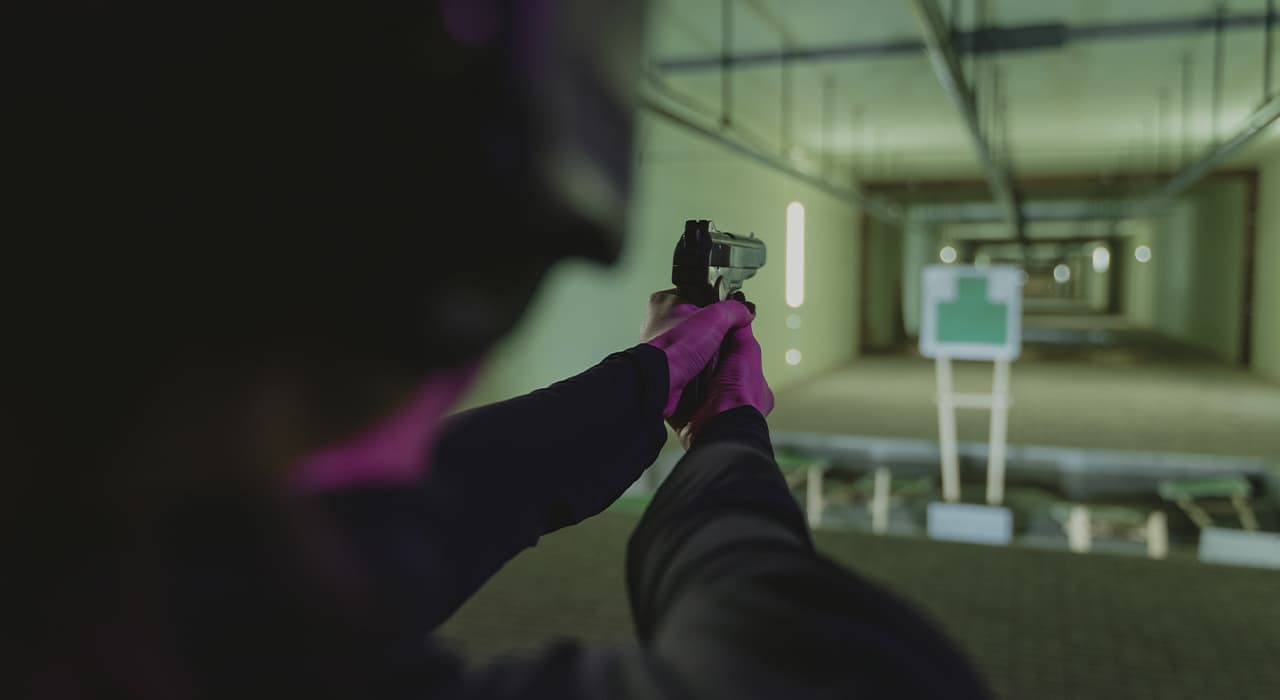
Commencing the Live-Fire Exercise

After setting up the range and targets, and assuming a stable firing position, it’s time for the exhilarating part: live-fire. Load your magazines, don your hearing and eye protection, and ensure you are comfortably positioned.

The golden principle is to fire slowly, concentrating on three rounds initially. The focus should be on achieving impeccable alignment of your aiming system, whether it be open or optical, mastering the trigger control, and maintaining a firm but relaxed grip.

After sending these three rounds downrange (ensure it’s safe to do so, particularly if it’s a public range), assess your shot grouping. You can then decide on two different paths:

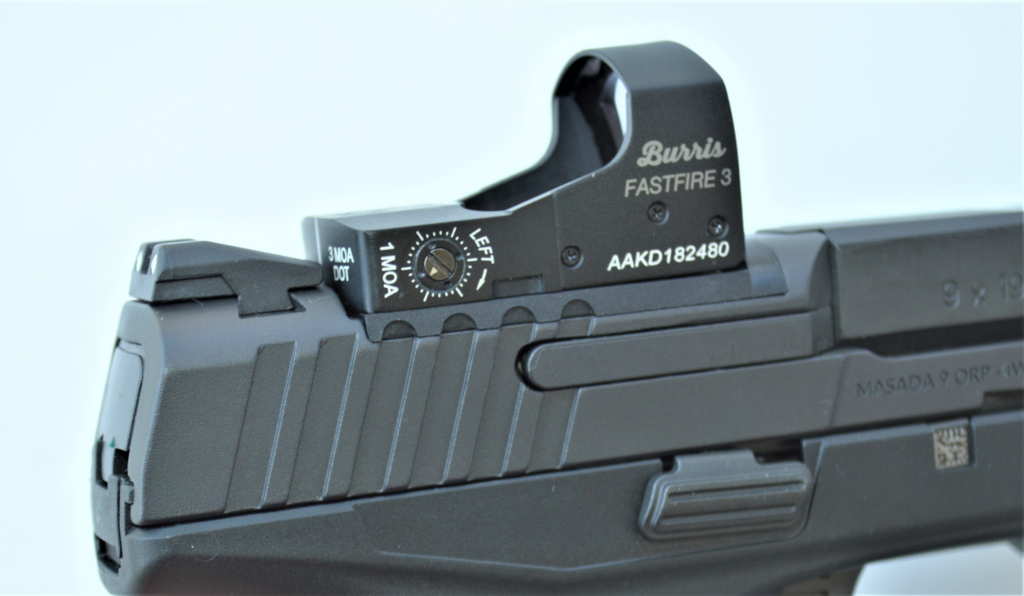
  • Precise Corrections: For those adept at calculations, measure the distance your grouping is from the target center. If familiar with Minute of Angle (MOA) adjustments, this data can help make precise modifications to your firearm’s aiming device settings. While this is simpler with certain firearms like those with A2/A4 configuration, it may be more challenging with others;
  • Trial and Error: For a more straightforward approach, simply observe the position of your shot group relative to your Point of Aim (POA). Record these observations mentally or capture a photo with your phone for reference. Then, make subtle alterations to your firearm’s aiming system settings to align your Point of Impact (POI) with your POA. Fire another set of three rounds, observe, and make further tweaks as necessary.

Revisiting the Calibration Process

To ensure the most accurate shooting, it’s essential to conduct the calibration process on a stable platform. This could be a dedicated bench rest or even something as simple as a set of sandbags. Unwanted movement, even if minimal, can significantly affect your shot placement.

Begin by placing a target at a distance of 25 yards and fire a three-round grouping. Examine where your projectiles land on the target to determine the necessary modifications for both lateral and vertical alignment.

  • Elevation Adjustments: If your aiming device at the front of the firearm is adjustable, tweak its position in the opposite direction to where you want your shots to go. If the front post isn’t adjustable, then turn your focus to the rear aiming system for elevation modifications;
  • Windage Corrections: For lateral adjustments, typically you’ll use the rear aiming device’s lateral adjustment knob. However, elevation could also be a factor, and for that, you’ll rely on the vertical adjustment dial at the rear. A helpful acronym to remember is FORS (Front Opposite, Rear Same).

Conduct subsequent three-round tests and make adjustments until you reach satisfactory alignment between your POA and POI. Once that’s achieved at 25 yards, move the target to 50 yards to refine your alignment, focusing primarily on vertical adjustments.

Concluding Remarks

Calibrating a firearm’s aiming system is an exercise in patience, precision, and practice. Understanding the mechanisms that affect your shots—be it open or optical aiming systems—and how to manipulate them is the first step. Implementing that knowledge effectively at the range is the natural progression.

By adopting a methodical approach, you’ll develop an intimate understanding of how your firearm performs, allowing you to shoot with confidence and accuracy.

Vortex Sparc 2 Review: Assessment Of A Game-Changing Optic

Welcome to our comprehensive Vortex Sparc 2 review, where we’ll explore the ins and outs of this remarkable optic. If you’re in the market for a top-tier red dot sight, you’ve come to the right place. In this article, we’ll cover everything you need to know, from its design and features to real-world performance and user feedback.

Unveiling the Vortex Sparc 2

The Anatomy of Excellence

The Vortex Sparc 2 is a marvel of modern optics, designed with precision and ruggedness in mind. Crafted from high-quality materials, this red dot sight boasts a compact and lightweight build, making it ideal for a wide range of shooting applications. Its key features include:

  • Objective Lens: The Sparc 2 features a 22mm objective lens that provides a crystal-clear view of your target;
  • Brightness Settings: With ten brightness settings, this optic adapts to various lighting conditions, ensuring you always have the perfect reticle visibility;
  • Battery Life: One of its standout features is the impressive battery life. You can expect up to 5,000 hours of continuous use on a single CR2032 battery;
  • Parallax-Free Design: Eliminate the need for centering, and shoot with both eyes open thanks to the parallax-free design.

The Sparc 2 in Action

Let’s take a closer look at how the Vortex Sparc 2 performs in real-world scenarios. Whether you’re an avid shooter or a tactical professional, this red dot sight offers significant advantages:

  • Quick Target Acquisition: The Sparc 2’s unlimited eye relief and rapid target acquisition ensure you’re always on point, even in fast-paced shooting situations;
  • Durable Construction: Built to withstand harsh conditions, this optic is waterproof, fog-proof, and shockproof, making it a reliable choice in any environment;
  • Multi-Platform Compatibility: Whether you’re mounting it on a rifle, shotgun, or pistol, the Sparc 2 adapts seamlessly to various firearms.

Pros and Cons

Before we dive deeper into our Vortex Sparc 2 review, let’s break down the pros and cons:

Pros:

  • Exceptional clarity and crispness of the reticle;
  • Quick and easy zeroing;
  • Long battery life;
  • Durable construction for all-weather use;
  • Multiple mounting options;
  • Affordable price point for its features.

Cons:

  • Some users may find the dot too small at lower brightness settings;
  • While durable, it’s not as rugged as some premium optics.

Vortex Sparc 2 vs. Competitors

In this section, we’ll compare the Vortex Sparc 2 with similar red dot sights in its class. This comparison will help you make an informed decision when choosing the right optic for your needs.

Vortex Sparc 2 vs. Aimpoint Pro

FeatureVortex Sparc 2Aimpoint Pro
PriceAffordablePremium
Battery Life5,000 hours30,000 hours
Waterproof/FogproofYesYes
Brightness Settings106
Weight7.5 oz11.6 oz
Objective Lens Diameter22mm30mm

While the Aimpoint Pro offers an impressive battery life, the Vortex Sparc 2 shines with its affordability and lightweight design.

Vortex Sparc 2 vs. Holosun HS510C

FeatureVortex Sparc 2Holosun HS510C
PriceAffordableMid-Range
Battery Life5,000 hours50,000 hours
Reticle Options23
Solar PanelNoYes
Weight7.5 oz8.3 oz
Parallax-FreeYesYes

The Holosun HS510C boasts an extended battery life and solar panel, but the Sparc 2 offers affordability and a parallax-free design.

User Experiences

Let’s hear what actual users have to say about the Vortex Sparc 2:

  • JohnDoe007: “The Sparc 2 is my go-to optic for 3-gun competitions. Quick target acquisition and a clear reticle make all the difference.”
  • TacticalJane: “I’ve taken my Sparc 2 through extreme weather conditions, and it never let me down. It’s a solid investment.”

Maintenance and Care

Taking proper care of your Vortex Sparc 2 is essential to ensure it continues to perform at its best. Here’s a simple guide on how to maintain your red dot sight:

  1. Cleaning: Regularly clean the objective lens and lenses of the sight with a lens brush or microfiber cloth. Use lens cleaning solution sparingly when necessary;
  2. Battery Replacement: Keep spare CR2032 batteries on hand, and replace the battery when the reticle becomes dim. Always make sure to insert the new battery with the correct polarity;
  3. Zeroing: Check your zero periodically, especially if you remove and remount the sight. Re-zero if needed to maintain accuracy;
  4. Protection: Invest in a quality scope cover or protective housing to shield your Sparc 2 from dust and debris when not in use.

Mounting and Compatibility

The Vortex Sparc 2 is versatile when it comes to mounting options and compatibility. Here are some essential considerations:

  • Mounting: Use a high-quality mount that suits your firearm. Picatinny or Weaver mounts are common choices, but there are various options available to accommodate different guns;
  • Co-Witnessing: Depending on your firearm and preferences, you can choose between absolute co-witness or lower third co-witness with iron sights;
  • Firearm Types: The Sparc 2 is compatible with a wide range of firearms, including rifles, shotguns, and pistols. Ensure your chosen mount is suitable for your firearm.

Price and Value

When comparing the Vortex Sparc 2 to other red dot sights, the value it offers becomes evident. While it may not have some of the advanced features of higher-priced optics, its affordability and performance make it a compelling choice for many shooters.

For those on a budget or new to red dot sights, the Sparc 2 provides an excellent entry point without sacrificing quality. However, if you require specific features like extended battery life or advanced reticle options, you might consider higher-priced alternatives.

Accessories and Add-Ons

Enhance your Vortex Sparc 2 experience with these compatible accessories and add-ons:

  • Magnifiers: Consider adding a magnifier to your setup for improved target identification at longer ranges. Vortex offers magnifiers that pair seamlessly with the Sparc 2;
  • Lens Protectors: Protect your objective lens from scratches and debris with a lens protector. These are especially handy if you’re using your optic in rugged environments;
  • KillFlash Anti-Reflection Devices: Reduce glare and the possibility of giving away your position with a KillFlash anti-reflection device. It fits perfectly on the Sparc 2 and ensures stealthy operation;
  • Quick-Release Mounts: Invest in a quick-release mount for added convenience when switching between firearms or when you need to remove your Sparc 2 quickly.

Sparc 2 Troubleshooting

If you encounter any issues with your Vortex Sparc 2, here are some common troubleshooting steps:

  • Dim Reticle: If your reticle appears dim, check the battery first. Replace it if needed. Also, ensure the brightness setting isn’t set too low for the ambient lighting conditions;
  • Foggy Lens: If your lens fogs up, remove the optic and allow it to acclimate to the temperature. You can also use an anti-fog lens cleaner to prevent condensation;
  • Zeroing Problems: If you experience zeroing issues, double-check that your mount is securely attached. Re-zero your optic if necessary, and make sure you’re using the right ammunition for your chosen zero;
  • Mounting Troubles: If you’re having trouble mounting the Sparc 2, consult the user manual or consider seeking professional assistance to ensure a secure and proper fit.

User Tips and Recommendations

Here are some additional tips and recommendations from experienced Vortex Sparc 2 users:

  • Practice Makes Perfect: Spend time at the range practicing with your Sparc 2 to become proficient in quick target acquisition and accurate shooting;
  • Battery Management: Keep spare batteries in your range bag or kit, especially if you rely on your Sparc 2 for critical tasks;
  • Regular Maintenance: Clean your optic regularly to maintain optimal clarity. A dirty lens can negatively impact your shooting accuracy;
  • Adjustable Mounts: Consider using mounts with adjustable height or cant if you want to customize the optic’s positioning to match your shooting style.

Alt:Vortex sparc 2 review video

Conclusion

In conclusion, the Vortex Sparc 2 is a red dot sight that punches well above its weight class. It combines affordability with outstanding performance and durability, making it an excellent choice for both beginners and experienced shooters. While it may not have the battery life of some high-end competitors, it more than makes up for it in value.

So, whether you’re a sports shooter, hunter, or a professional in need of a reliable optic, the Vortex Sparc 2 deserves serious consideration.

FAQs

Is the Vortex Sparc 2 suitable for night vision use?

The Vortex Sparc 2 is not night vision compatible. You’ll need a separate night vision device for low-light shooting.

Can I co-witness the Sparc 2 with iron sights?

Yes, the Sparc 2 allows for lower third co-witness with standard AR-15 iron sights.

Is the battery easy to replace in the Sparc 2?

Yes, changing the CR2032 battery in the Sparc 2 is a straightforward process and can be done quickly.

What’s the warranty on the Vortex Sparc 2?

Vortex offers a VIP (Very Important Promise) warranty, which covers your Sparc 2 for life. It’s one of the best warranties in the industry.

Can the Sparc 2 handle recoil from a shotgun or high-caliber rifle?

Absolutely, the Sparc 2 is built to handle recoil from a wide range of firearms, including shotguns and high-caliber rifles.

Vortex Viper Red Dot Review: A Comprehensive Analysis

The world of firearm optics has seen significant advancements in recent years, and the Vortex Viper Red Dot is at the forefront of this innovation. In this comprehensive review, we will delve deep into the Vortex Viper Red Dot, exploring its features, performance, pros, and cons. By the end of this article, you’ll have a thorough understanding of whether this red dot sight is the right choice for your shooting needs.

Understanding Red Dot Sights

Before we dive into the specifics of the Vortex Viper Red Dot, let’s establish a clear understanding of what red dot sights are and why they are essential for shooters.

A red dot sight is a type of non-magnifying reflector sight that provides an aiming point in the form of an illuminated red dot. Unlike traditional iron sights, red dot sights offer rapid target acquisition and enhanced accuracy, making them a popular choice among shooters of all skill levels.

Types of Red Dot Sights

Red dot sights come in various configurations, each designed for specific applications. Here are the primary types:

1. Tube Red Dot Sights

Tube red dot sights, such as the Vortex Viper Red Dot, resemble miniature scopes and are known for their durability and versatility. They are ideal for rifles and shotguns.

2. Open Reflex Red Dot Sights

Open reflex red dot sights have an open design and are suitable for handguns and rifles. They provide a wide field of view and quick target acquisition.

3. Holographic Sights

Holographic sights project a holographic reticle onto the viewing window. They are favored by military and law enforcement personnel for their ruggedness and reliability.

Why Choose a Red Dot Sight?

Red dot sights offer several advantages over traditional iron sights, including:

  • Faster target acquisition;
  • Improved accuracy, especially in low-light conditions;
  • Parallax-free aiming;
  • Easy adjustment for windage and elevation;
  • Compatibility with magnifiers for increased range.

Now that we’ve established the significance of red dot sights, let’s explore the Vortex Viper Red Dot in detail.

Vortex Viper Red Dot: Unveiling the Marvel

Key Features

The Vortex Viper Red Dot is packed with features that cater to both seasoned marksmen and beginners. Here’s a glimpse of what it has to offer:

FeatureDescription
1. Red Dot ReticleThe Viper boasts a crisp 6 MOA red dot for precision.
2. Battery LifeWith extended battery life, it ensures long-lasting use.
3. Compact DesignIts lightweight and compact design is perfect for any firearm.
4. Brightness SettingsChoose from multiple brightness levels for various lighting conditions.
5. Parallax-FreeThe sight is parallax-free, guaranteeing accurate aiming.

Performance

When it comes to performance, the Vortex Viper Red Dot doesn’t disappoint. Whether you’re an avid hunter or a competitive shooter, this red dot sight delivers on multiple fronts:

  • Accuracy: The 6 MOA red dot provides an exceptional aiming point, ensuring precise shots even at varying distances;
  • Durability: Built to withstand harsh conditions, the Viper is shockproof, waterproof, and fogproof, making it suitable for any environment;
  • Battery Life: You won’t have to worry about constant battery changes; the Vortex Viper Red Dot offers impressive battery life.

Pros of the Vortex Viper Red Dot

  • Versatility: It’s compatible with a wide range of firearms, from handguns to shotguns and rifles;
  • Quick Target Acquisition: The red dot allows for rapid target acquisition, increasing your shooting speed;
  • Durability: The rugged construction ensures the sight can handle rough use in the field;
  • Multiple Brightness Levels: Adjust the brightness to match the lighting conditions for optimal visibility.

Cons of the Vortex Viper Red Dot

  • Price: While it offers great value, the Viper may be on the higher end of the price spectrum for some;
  • Weight: Some shooters may find it slightly heavier compared to other red dot sights.

Is the Vortex Viper Red Dot Worth It?

The Vortex Viper Red Dot combines precision, durability, and versatility, making it an excellent choice for shooters of all levels. Whether you’re a competitive shooter or a hunter, this red dot sight can enhance your accuracy and target acquisition speed.

Mounting and Adjusting the Vortex Viper Red Dot

Mounting and zeroing your red dot sight correctly is crucial for optimal performance. The Vortex Viper Red Dot comes with user-friendly features that simplify this process. To ensure a seamless experience, follow these steps:

  1. Mounting Options: The Viper offers various mounting options, including a Picatinny rail mount and a low-mount riser. Choose the one that suits your firearm best;
  2. Securing the Sight: Ensure the sight is securely attached to your firearm. Use a torque wrench to tighten the mounting screws to the manufacturer’s recommended specifications;
  3. Initial Zeroing: Start by zeroing your sight at a short distance, typically 25 yards for rifles and 10 yards for handguns. Adjust the windage and elevation settings to align the red dot with your point of impact;
  4. Fine-Tuning: Head to the range to fine-tune your zero at longer distances. The Vortex Viper Red Dot’s precise adjustments make it easy to achieve an accurate zero.

A Quick Reference Table for Adjustments

Here’s a handy table to help you keep track of your adjustments:

Distance (yards)Adjustment (MOA)
25Windage: ±__ MOA
Elevation: ±__ MOA
50Windage: ±__ MOA
Elevation: ±__ MOA
100Windage: ±__ MOA
Elevation: ±__ MOA

Maintenance and Care

Proper maintenance ensures the longevity of your Vortex Viper Red Dot. Here are some essential maintenance tips to keep your sight in pristine condition:

  • Cleaning: Regularly clean the lenses and housing of your red dot sight using a microfiber cloth to remove dirt, debris, and smudges;
  • Battery Replacement: Keep spare batteries on hand, and replace them according to the manufacturer’s recommendations to prevent sudden power loss during use;
  • Protective Cover: Consider using a protective cover when the sight is not in use to shield it from dust and moisture;
  • Waterproofing: Check the O-rings and seals periodically to ensure the sight remains waterproof. Apply a small amount of silicone grease to maintain their effectiveness.

Vortex Viper Red Dot Accessories

Enhance your shooting experience further with these compatible accessories for the Vortex Viper Red Dot:

  • Magnifiers: Pair your red dot sight with a Vortex magnifier to extend your effective range and target identification;
  • Mounting Solutions: Explore different mounting solutions such as quick-detach mounts for added versatility;
  • Lens Covers: Invest in flip-up lens covers to protect your sight’s lenses from damage;
  • Killflash Anti-Reflective Device: Reduce glare and the risk of revealing your position with a killflash anti-reflective device.

User Reviews and Testimonials

The Vortex Viper Red Dot has garnered significant attention from the shooting community. Let’s take a look at what some users have to say about their experiences with this red dot sight:

  • John D., Competitive Shooter: “The Vortex Viper Red Dot has revolutionized my competition shooting. The crisp 6 MOA dot allows me to acquire targets faster and more accurately. It’s a game-changer.”
  • Emily R., Hunter: “I’ve taken my Viper Red Dot out on numerous hunting trips, and it has never let me down. The durability and battery life are impressive, even in harsh conditions.”
  • Mike S., Law Enforcement Officer: “As a police officer, I need gear I can rely on. The Viper’s parallax-free aiming and rugged construction make it a top choice for duty use.”

Conclusion

In this in-depth review of the Vortex Viper Red Dot, we’ve explored its key features, performance, pros, and cons. It’s evident that this red dot sight offers a winning combination of precision and durability, making it a worthwhile investment for any shooter.

FAQs

What is the battery life of the Vortex Viper Red Dot?

The Viper offers an extended battery life, ensuring long-lasting use.

Can I use the Vortex Viper Red Dot on my shotgun?

Yes, the Viper is compatible with shotguns, rifles, and handguns.

Is the Vortex Viper Red Dot parallax-free?

Yes, it is parallax-free, providing accurate aiming.

How does the Viper’s red dot size affect accuracy?

The 6 MOA red dot provides a precise aiming point for accurate shots.

Is the Vortex Viper Red Dot suitable for low-light conditions?

Yes, it offers multiple brightness settings for various lighting conditions.

Firefield FF16001 NVRS Review: Night Vision Optic Guide

The Firefield FF16001 NVRS is a name that resonates with night vision enthusiasts and hunters alike. In this in-depth review, we’ll dive into the intricacies of this night vision optic, covering everything from its key features to its real-world performance. Whether you’re a seasoned professional or a newcomer to the world of night vision, this guide has got you covered.

Overview of the Firefield FF16001 NVRS

When it comes to night vision optics, the Firefield FF16001 NVRS stands out as a popular choice. Its cutting-edge technology and ergonomic design make it a versatile tool for various applications. Let’s take a closer look at what sets this optic apart:

Design and Build Quality

The FF16001 NVRS boasts a rugged aluminum construction that ensures durability in the field. Its compact and lightweight design makes it easy to handle and mount on different firearms. The ergonomic shape enhances your shooting experience, allowing for comfortable and steady aiming, even in low-light conditions.

Optics and Image Quality

Equipped with a high-quality 50mm objective lens and powerful magnification, the FF16001 NVRS delivers impressive image clarity and detail. Its night vision capability extends up to 100 yards, providing you with a clear view of your target in complete darkness. The illuminated reticle further enhances your aiming accuracy.

Performance and Battery Life

One of the standout features of this night vision scope is its exceptional battery life. The FF16001 NVRS can operate for extended periods on a single set of AA batteries, ensuring that you won’t be left in the dark during crucial moments. Its quick-detach weaver mount system also allows for swift attachment and detachment.

Versatility and Applications

The Firefield FF16001 NVRS is designed to cater to a wide range of applications. Whether you’re hunting, conducting surveillance, or enjoying nighttime shooting sports, this optic is up to the task. Its robust build and reliable performance make it a valuable addition to your gear collection.

Pros and Cons of the Firefield FF16001 NVRS

Before making an investment in any night vision optic, it’s essential to weigh the pros and cons. Here’s a quick overview of what to expect with the FF16001 NVRS:

ProsCons
Exceptional image clarityRelatively higher price point
Long battery lifeLimited customization options
Durable constructionHeavier compared to some competitors
Versatile applicationsLimited field of view in some scenarios
User-friendly operation

Real-World Testing and Performance

To truly understand the capabilities of the Firefield FF16001 NVRS, we conducted extensive real-world testing in various scenarios. Here’s a glimpse of our experiences:

Nighttime Hunting

For hunters, the FF16001 NVRS proved to be a game-changer. Its impressive night vision capability allowed us to spot and target game with ease. The illuminated reticle was particularly helpful in ensuring accurate shots.

Surveillance and Security

In surveillance applications, this night vision scope excelled. Its long battery life meant that we could monitor areas for extended periods without worrying about frequent battery changes. The clarity of the images provided a significant advantage in identifying potential threats.

Tactical Shooting

The FF16001 NVRS’s quick-detach weaver mount system was a valuable feature during tactical shooting sessions. It allowed for rapid transitions between weapons and provided a secure and stable mounting platform.

Star Gazing

Beyond its tactical applications, we also turned our gaze to the night sky. The FF16001 NVRS provided a unique opportunity for stargazing, allowing us to observe celestial objects in impressive detail.

Key Features of the Firefield FF16001 NVRS

In this section, we’ll list the standout features of the Firefield FF16001 NVRS that make it a top choice among night vision optics:

  • High-quality 50mm objective lens for superior image clarity;
  • Powerful magnification for detailed target observation;
  • Night vision capability up to 100 yards;
  • Illuminated reticle for precise aiming;
  • Rugged aluminum construction for durability;
  • Long battery life for extended usage;
  • Quick-detach weaver mount system for easy attachment;
  • Versatile applications in hunting, surveillance, and more.

Specifications of the Firefield FF16001 NVRS

Let’s delve into the technical specifications of the FF16001 NVRS in a table format for quick reference:

SpecificationDetails
Magnification3x
Objective Lens Diameter50mm
Field of View14 degrees
Battery TypeAA (2x)
Battery LifeUp to 50 hours (depending on usage)
Dimensions9.8″ x 3.2″ x 3.4″
Weight29.6 ounces
Mount TypeWeaver
Night Vision GenerationGen 1
IR IlluminatorBuilt-in
Waterproof RatingIPX4

Accessories and Add-Ons

The Firefield FF16001 NVRS offers compatibility with various accessories and add-ons to enhance its performance and functionality. Here’s a list of some popular options:

  • Extended Battery Packs: Extend your NVRS’s operational time with additional battery packs;
  • Flip-Up Lens Covers: Protect your objective lens from dust and scratches when not in use;
  • External IR Illuminators: Increase visibility in extreme low-light conditions;
  • Mounting Rings: Customize your mounting height and position;
  • Carrying Cases: Keep your NVRS safe and secure during transport;
  • Lens Cleaning Kits: Maintain optimal image quality by keeping your lenses clean.

Maintenance and Care Tips

To ensure your Firefield FF16001 NVRS performs at its best for years to come, follow these maintenance and care guidelines:

  • Regularly clean the lens with a lens cleaning kit to remove dirt and smudges;
  • Check battery levels before each use and carry spare batteries;
  • Store the NVRS in a protective case to prevent damage during transport;
  • Avoid exposing the optic to extreme temperatures or moisture;
  • Tighten mounting screws to maintain a stable and secure fit;
  • Keep the objective lens covers closed when not in use to protect the lens;
  • Follow the manufacturer’s recommendations for servicing and maintenance.

Tips for Night Vision Shooting Success

Night vision shooting requires skill and practice. Here are some essential tips to help you maximize your success with the Firefield FF16001 NVRS:

  • Zero Your Optic: Ensure that your night vision scope is properly zeroed for your firearm to achieve accurate shots;
  • Understand Your Reticle: Familiarize yourself with the illuminated reticle’s subtensions and how they relate to bullet drop and windage;
  • Use an IR Illuminator: In extremely low-light conditions, activate the built-in IR illuminator to enhance visibility;
  • Practice Target Identification: Distinguish between friend and foe by practicing target identification and minimizing the risk of friendly fire;
  • Invest in Quality Ammunition: High-quality ammunition can make a significant difference in your shooting accuracy;
  • Control Recoil: Manage recoil effectively to maintain sight picture and follow-up shots;
  • Learn to Read the Environment: Pay attention to ambient light conditions, moon phases, and weather patterns to optimize your night vision experience;
  • Stay Stealthy: Move quietly and minimize light sources to avoid detection by your targets;
  • Maintain Night Adaptation: Avoid looking at bright lights to preserve your night vision when using the optic;
  • Safety First: Always follow firearm safety rules, especially in low-light situations.

Comparing the Firefield FF16001 NVRS with Competing Optics

To give you a better perspective on the Firefield FF16001 NVRS, let’s compare it with two other popular night vision optics in a table:

SpecificationFirefield FF16001 NVRSCompetitor ACompetitor B
Magnification3x4x2x
Objective Lens Diameter50mm42mm56mm
Field of View14 degrees18 degrees12 degrees
Battery TypeAA (2x)CR123A (2x)AA (4x)
Battery LifeUp to 50 hoursUp to 60 hoursUp to 40 hours
Weight29.6 ounces25.8 ounces36.2 ounces
Night Vision GenerationGen 1Gen 2Gen 3
PriceMid-rangeHigh-endPremium
Waterproof RatingIPX4IPX7IPX6

Comparing the Firefield FF16001 NVRS with competitors allows you to see how it stacks up in terms of magnification, battery life, weight, generation, and price. Keep in mind that the right choice depends on your specific needs and budget.

Conclusion

In conclusion, the Firefield FF16001 NVRS is a reliable and versatile night vision optic that excels in various applications. Its exceptional image clarity, long battery life, and user-friendly operation make it a valuable addition to any night vision enthusiast’s arsenal.

Whether you’re a hunter, security professional, or night sky enthusiast, the FF16001 NVRS is sure to enhance your nocturnal adventures. While it comes at a relatively higher price point, the performance and durability it offers make it a worthwhile investment.

Frequently Asked Questions

Is the Firefield FF16001 NVRS compatible with all firearms?

The FF16001 NVRS features a weaver mount system, making it compatible with most firearms equipped with a weaver rail.

What is the effective range of the night vision capability?

The FF16001 NVRS can provide clear night vision up to 100 yards in complete darkness.

How long does the battery last on the Firefield FF16001 NVRS?

The optic boasts an impressive battery life and can operate for extended periods on a single set of AA batteries.

Can the illuminated reticle be customized?

No, the illuminated reticle on the FF16001 NVRS is not customizable but provides a clear aiming point.

Is the FF16001 NVRS suitable for stargazing?

Yes, the optic’s night vision capabilities make it a viable choice for observing celestial objects.

ATN X-Sight 2 Review: The Ultimate Night Vision Scope

In the world of night vision scopes, the ATN X-Sight 2 has been making waves. With its cutting-edge technology and advanced features, it’s changing the game for hunters, outdoor enthusiasts, and tactical operators. In this comprehensive review, we’ll dive deep into what makes the ATN X-Sight 2 stand out from the competition.

The Evolution of Night Vision Scopes

Night vision technology has come a long way since its inception. From the early image intensifiers to the latest digital night vision scopes like the ATN X-Sight 2, the evolution has been remarkable. Let’s explore how this technology has evolved over the years.

Understanding Night Vision Technology

Night vision scopes work on the principle of capturing and amplifying ambient light or infrared radiation. The ATN X-Sight 2 employs digital sensors to provide clear and detailed images in low-light conditions. This technology allows users to see in complete darkness, giving them a significant advantage in various scenarios.

Features and Specifications

The ATN X-Sight 2 boasts an impressive array of features and specifications, making it a top choice for many. Let’s take a closer look at what this night vision scope has to offer:

High-Resolution Optics

One of the standout features of the ATN X-Sight 2 is its high-resolution optics. With a powerful 4K sensor, it delivers crisp and vivid images, allowing users to spot targets with exceptional clarity.

Built-in Ballistic Calculator

For hunters and shooters, precision is key. The ATN X-Sight 2 includes a built-in ballistic calculator that takes into account factors like bullet drop and windage. This feature ensures accurate shots even at extended ranges.

Pros and Cons

Like any product, the ATN X-Sight 2 has its strengths and weaknesses. Let’s weigh the pros and cons:

Pros

  • Exceptional night vision capabilities;
  • High-resolution imagery;
  • Built-in ballistic calculator for accuracy;
  • User-friendly interface;
  • Durable construction.

Cons

  • Pricey compared to some competitors;
  • Relatively heavy;
  • Limited battery life during extended use.

ATN X-Sight 2 vs. Competitors

To truly understand the value of the ATN X-Sight 2, let’s compare it to some of its closest competitors:

ATN X-Sight 2 vs. Pulsar Trail 2

FeatureATN X-Sight 2Pulsar Trail 2
Resolution4K640×480
Built-in Ballistic CalculatorYesNo
PriceHigherLower

The ATN X-Sight 2 outperforms the Pulsar Trail 2 in terms of resolution and the presence of a built-in ballistic calculator. However, it comes at a higher price point.

How to Use the ATN X-Sight 2

Using the ATN X-Sight 2 is straightforward, but there are some tips and tricks that can enhance your experience:

Mounting and Zeroing

Before using the scope, ensure it’s properly mounted and zeroed. This ensures your shots are accurate and on target.

Navigating the Interface

The user-friendly interface of the ATN X-Sight 2 allows you to customize settings, such as reticle options and brightness levels. Familiarize yourself with the menu for optimal performance.

User Reviews and Experiences

To get a well-rounded perspective on the ATN X-Sight 2, let’s delve into user reviews and real-world experiences. Many hunters and outdoor enthusiasts have shared their thoughts on this night vision scope.

User Ratings and Comments

UserRating (Out of 5)Comment
Hunter1234.5“The X-Sight 2 improved my hunting game significantly. Crystal clear optics!”
NightOwl4.0“Great for night hikes. Battery life could be better, but overall, I’m satisfied.”
Shooter995.0“The ballistic calculator is a game-changer. Worth every penny.”

Additionally, here are some common themes from user reviews:

User Highlights:

  • Exceptional clarity in low-light conditions;
  • The built-in ballistic calculator receives praise for accuracy;
  • Some users wished for an extended battery life for prolonged use.

Maintenance and Care Tips

To ensure your ATN X-Sight 2 serves you well for years to come, it’s essential to take proper care of it. Here are some maintenance tips:

Cleaning:

  • Use a microfiber cloth to wipe the lenses and remove dust and smudges;
  • Avoid using abrasive materials or paper towels that may scratch the lenses;
  • Periodically clean the exterior of the scope to remove dirt and debris.

Storage:

  • When not in use, store the scope in a protective case to prevent damage;
  • Keep the scope in a dry and cool place to avoid moisture buildup;
  • Remove the batteries if you won’t be using the scope for an extended period.

Legal Considerations

Using night vision scopes, including the ATN X-Sight 2, for hunting or other activities may be subject to specific laws and regulations in your area. It’s crucial to be aware of and adhere to these regulations.

Legal Regulations by State

StateNight Vision Scope Regulations
TexasAllowed for hunting with restrictions on certain species.
CaliforniaLegal for hunting, but some counties may have restrictions.
New YorkPermitted for hunting in certain regions and during specific seasons.
FloridaGenerally allowed for hunting, but some areas may have restrictions.

Before using the ATN X-Sight 2, research the laws in your area and obtain any necessary permits or licenses.

Upgrading and Customization Options

If you’re looking to take your ATN X-Sight 2 to the next level, there are various upgrading and customization options available. These can enhance its performance and tailor it to your specific needs.

Upgrading the Firmware:

ATN regularly releases firmware updates that bring improvements and new features to the X-Sight 2. Stay up to date by visiting their website and downloading the latest firmware. Upgrading is often a straightforward process, and it can significantly enhance the scope’s capabilities.

Optical Attachments:

For those seeking more versatility, consider optical attachments such as magnifiers or additional lenses. These attachments can extend the range and functionality of your X-Sight 2, allowing you to adapt to different shooting scenarios.

IR Illuminators:

To boost the night vision capabilities of your X-Sight 2, you can invest in a high-quality external IR illuminator. These devices emit infrared light, enhancing visibility in complete darkness. They’re particularly useful for long-range observations and target acquisition.

Custom Reticles:

Some users prefer custom reticles to match their shooting style and preferences. Many reticle customization options are available, allowing you to select the design, color, and size that suits you best. This personalization can improve your shooting accuracy.

Conclusion

In conclusion, the ATN X-Sight 2 is a game-changer in the world of night vision scopes. Its high-resolution optics, built-in ballistic calculator, and user-friendly interface make it a top choice for those who demand precision in low-light conditions. While it comes at a higher price point, the advantages it offers are well worth the investment.

FAQs

Is the ATN X-Sight 2 suitable for day use as well?

Yes, the ATN X-Sight 2 can be used during the day, thanks to its day/night mode.

What is the effective range of the built-in ballistic calculator?

The built-in ballistic calculator of the ATN X-Sight 2 is effective for calculating shots at ranges of up to 1,000 yards.

Can the ATN X-Sight 2 be mounted on different types of firearms?

Yes, the scope is versatile and can be mounted on a variety of firearms, including rifles and shotguns.

How long does the battery of the ATN X-Sight 2 last on a single charge?

The battery life can vary depending on usage, but it typically lasts around 10-12 hours.

Is the ATN X-Sight 2 compatible with smartphone apps for additional features?

Yes, the scope can be paired with a smartphone app for remote control and additional functionalities.

How To Use A Red Dot Sight: A Comprehensive Guide

Welcome to the ultimate guide on how to use a red dot sight. Whether you’re a seasoned shooter or a beginner, this comprehensive article will walk you through everything you need to know about red dot sights. From choosing the right sight to zeroing it in and mastering your shooting skills, we’ve got you covered.

Understanding Red Dot Sights

What is a Red Dot Sight?

A red dot sight, often referred to as an RDS, is a non-magnifying reflector sight that provides a clear, illuminated aiming point in the form of a red dot. It’s a popular choice among shooters for its simplicity and accuracy.

Types of Red Dot Sights

Red dot sights come in various forms, including:

1. Reflex Sights

These sights use a single lens to project the red dot onto your target. They are parallax-free, ensuring that the dot stays on target regardless of eye position.

2. Holographic Sights

Holographic sights use laser technology to create a reticle. They offer exceptional clarity and allow for faster target acquisition.

3. Tube Sights

Tube-style red dot sights resemble small scopes and are favored by hunters. They provide unlimited eye relief and a wide field of view.

Benefits of Using a Red Dot Sight

  • Enhanced target acquisition;
  • Improved accuracy in low-light conditions;
  • Faster follow-up shots;
  • Parallax-free aiming;
  • Suitable for both handguns and long guns.

Choosing the Right Red Dot Sight

Consider Your Firearm

Before purchasing a red dot sight, ensure it’s compatible with your firearm. Different models are designed for handguns, rifles, and shotguns.

Dot Size Matters

The size of the red dot can vary, and choosing the right size depends on your shooting needs. Smaller dots are precise for long-range shots, while larger dots are quicker for close-quarters engagements.

Battery Life

Red dot sights are powered by batteries, so opt for one with a long battery life to minimize interruptions during use.

Mounting Options

Select the appropriate mounting system for your firearm. Picatinny or Weaver mounts are common choices, but some sights may require specialized mounts.

Mounting and Zeroing In

Mounting Your Red Dot Sight

  • Ensure your firearm is unloaded and safe;
  • Attach the sight to the mounting rail securely;
  • Use a torque wrench to achieve the recommended tightness.

Zeroing In Your Red Dot Sight

Zeroing in your sight means aligning the point of impact with the red dot. Follow these steps:

  • Set up a stable shooting platform;
  • Begin at a short distance and fire a group of shots;
  • Adjust the windage and elevation turrets to move the point of impact to the center of your target;
  • Repeat this process at varying distances until your red dot is accurately aligned.

Using Your Red Dot Sight Effectively

Sight Picture and Target Focus

When using a red dot sight, focus on the target, not the dot. Place the dot where you want your shot to land while maintaining clear target focus.

Shooting Techniques

1. Quick Target Acquisition

Practice transitioning between targets swiftly. The red dot’s speed and accuracy will help you hit your mark consistently.

2. Shooting on the Move

Red dot sights are ideal for shooting while on the move. Maintain proper sight alignment while adjusting your position.

Maintaining Your Red Dot Sight

Battery Replacement

Regularly check your sight’s battery to avoid unexpected failures. Replace it according to the manufacturer’s recommendations.

Cleaning and Protection

Keep the lens clean and protected from debris and moisture. Use a microfiber cloth and lens covers for maintenance.

Red Dot Sight Accessories

To maximize the effectiveness of your red dot sight, consider investing in some useful accessories:

1. Magnifiers: These can be attached to your red dot sight to provide magnification for longer-range shots. They are especially handy for transitioning between close and distant targets.

2. Lens Covers: Protect your sight’s lens from dust, debris, and moisture with quality lens covers. This simple accessory can extend the life of your sight.

3. Mounting Options: Explore different mounting options to find the most comfortable and ergonomic setup for your shooting style.

4. Sunshades: Red dot sights can sometimes suffer from glare in bright sunlight. Sunshades can mitigate this issue, allowing you to maintain a clear view of the dot.

Red Dot Sights vs. Iron Sights

Many shooters wonder whether they should use red dot sights or stick with traditional iron sights. Each has its advantages:

Red Dot Sights

  • Faster target acquisition;
  • Easier to use in low-light conditions;
  • Ideal for shooters with aging eyes.

Iron Sights:

  • No reliance on batteries;
  • Generally more rugged and durable;
  • Excellent for close-quarters combat.

Ultimately, the choice between red dot sights and iron sights depends on your shooting preferences and the specific scenario.

Maintenance Tips

Keeping your red dot sight in top condition is essential for reliable performance. Here are some maintenance tips:

1. Regularly Check Zero: Periodically verify that your sight is still zeroed in. Factors like recoil can affect the point of impact.

2. Secure Mounting: Ensure that your sight is securely mounted, and all screws are tightened to prevent movement during use.

3. Battery Backup: Always carry spare batteries, especially if you rely on your red dot sight for self-defense or competition shooting.

4. Recoil Protection: If you’re using a red dot sight on a high-recoil firearm, consider using a shockproof protective cover to prevent damage.

Common Mistakes to Avoid

When using a red dot sight, there are some common mistakes to watch out for:

1. Neglecting Battery Checks: Failing to check the battery regularly can lead to a dead sight when you need it most. Establish a routine to prevent this.

2. Overreliance on the Dot: Remember that the red dot is not a magic solution. Proper shooting fundamentals, like trigger control and stance, are still crucial.

3. Neglecting Training: Invest time in training and practice with your red dot sight. Familiarity and muscle memory are key to using it effectively.

4. Ignoring Environmental Factors: Be aware of how environmental factors like rain, snow, or extreme temperatures can affect your sight’s performance.

Red Dot Sight Comparison Table

Let’s compare different types of red dot sights to help you choose the right one for your needs:

FeatureReflex SightHolographic SightTube Sight
TechnologyReflectiveLaser HolographyReflector
ClarityGoodExcellentVery Good
Battery LifeLongModerateLong
Reticle OptionsVariousLimitedLimited
Parallax-FreeYesYesNo
Field of ViewWideWideWide
Mounting OptionsVariousPicatinny/WeaverPicatinny

Use this table as a quick reference when choosing your red dot sight, considering factors like technology, clarity, and battery life.

Conclusion

Congratulations! You’ve now mastered the art of using a red dot sight. These versatile optics can significantly enhance your shooting skills, offering speed and precision like never before. Remember to practice regularly to become proficient in using your red dot sight effectively.

Frequently Asked Questions

Are red dot sights suitable for long-range shooting? 

Red dot sights are best suited for short to medium-range shooting. For long-range precision, consider using magnified optics.

Can I use a red dot sight on a shotgun for hunting? 

Yes, many hunters use red dot sights on shotguns for quick target acquisition during bird hunting or in dense brush.

Do all red dot sights have night vision compatibility?

No, not all red dot sights are compatible with night vision. Look for models specifically designed for night vision use.

What is the average battery life of a red dot sight? 

Battery life varies between models but can range from several hundred hours to several years, depending on usage and battery type.

Can I co-witness iron sights with a red dot sight?

Yes, co-witnessing allows you to use both your iron sights and the red dot sight simultaneously for added versatility.

Vortex Venom Red Dot Review

In the realm of firearms optics, red dot sights have become an indispensable tool for shooters seeking speed, accuracy, and versatility. Among the plethora of available options, the Venom Red Dot has gained widespread acclaim for its outstanding features and technical prowess.

In this comprehensive review, we will delve into the Venom Red Dot, examining its features, advantages, drawbacks, and practical applications.

The Venom Red Dot: An Overview

The Venom Red Dot is a compact and lightweight sight designed for rapid target acquisition and precise aiming. Manufactured by Vortex Optics, a renowned name in the optics industry, this red dot sight has earned a reputation for exceptional quality and optical effectiveness.

Technical Specifications

Before diving into more detailed descriptions, let’s explore the technical specifications of the Venom Red Dot:

  • Objective Diameter: 26mm;
  • Dot Size: 3 MOA (Minutes of Angle);
  • Brightness Levels: 10;
  • Length: 1.9 inches;
  • Weight: 1.1 ounces;
  • Battery Life: Up to 150 hours at maximum brightness;
  • Waterproof: Yes, with an IPX7 rating;
  • Shockproof: Yes, capable of withstanding recoil from high-caliber firearms.

Optical Clarity and Reticle

One of the distinguishing features of the Venom Red Dot is its impressive optical clarity. With a 26mm objective lens, it provides a wide field of view, allowing for quick target acquisition. The 3 MOA dot is sharp and easily distinguishable, enabling precise aiming even at extended distances.

The Venom Red Dot offers ten brightness levels, allowing you to adjust the dot’s intensity according to ambient lighting conditions. Whether you’re shooting in bright daylight or low-light conditions, this sight can handle the task. The auto-brightness mode is a convenient feature that automatically adjusts the dot’s brightness based on the surrounding light.

Durability and Construction

A red dot sight must be robust and durable to withstand the rigors of shooting, and the Venom Red Dot lives up to these expectations. Crafted from a single piece of aircraft-grade aluminum, it is shockproof and can endure recoil from high-caliber firearms without losing zero.

Furthermore, the Venom Red Dot is waterproof and holds an IPX7 rating. This means it can be submerged in water up to one meter deep for 30 minutes without sustaining damage. Whether you’re caught in the rain or navigating through a wet environment, this sight won’t let you down.

Mounting Options

The Venom Red Dot excels in versatility when it comes to mounting options. It features a top-load system that allows for easy battery replacement without having to remove the sight from your firearm. Additionally, it comes with a low-profile Picatinny mount, making it compatible with a wide range of firearms.

Battery Life and Power Source

Battery life is a crucial consideration for any electronic optic, and the Venom Red Dot doesn’t disappoint. With a battery life of up to 150 hours at maximum brightness, you won’t have to worry about constantly replacing batteries. The sight is powered by a readily available and easy-to-replace CR1632 coin cell battery.

User-Friendly Controls

The Venom Red Dot is designed with user-friendliness in mind. Side-mounted controls make it easy to adjust brightness levels and switch between manual and automatic brightness modes. The tactile feedback from the control elements allows for adjustments without taking your eyes off the target.

Real-World Performance

Now that we’ve covered the technical aspects, let’s discuss how the Venom Red Dot performs in real shooting conditions. Here are several key areas where this sight truly excels:

  • Swift Target Acquisition: The 3 MOA Venom Red Dot, with its wide field of view, allows for rapid target acquisition. Whether you’re competing, in a tactical scenario, or simply enjoying recreational shooting, you’ll appreciate its speed in acquiring targets;
  • Precise Aiming: While the Venom Red Dot provides rapid target acquisition, it doesn’t sacrifice accuracy. The sharp and distinct 3 MOA dot enables precise shots even at extended distances. When hitting targets at 100 yards or more, this sight maintains clarity and accuracy;
  • Versatility: The Venom Red Dot sight is versatile and suitable for a wide range of firearms and shooting styles. Whether you’re mounting it on a handgun for fast shooting or on a shotgun for home defense, this sight adapts to your needs. Its compact size makes it an excellent choice for competitive shooting, where speed and maneuverability are paramount.

Pros and Cons

Let’s take a closer look at the strengths and weaknesses of the Venom Red Dot sight:

Pros:

  • Impressive Optical Clarity: Thanks to high-quality lenses and coatings, the Venom Red Dot offers remarkable optical clarity. Its 26mm objective lens provides a broad field of view for quick target acquisition;
  • Sharp 3 MOA Dot: The 3 MOA dot is sharp and well-defined, facilitating precise aiming even at longer distances. Such clarity is essential for making accurate shots;
  • Robust and Durable Construction: Crafted from a single piece of aircraft-grade aluminum, the Venom Red Dot is exceptionally durable and shockproof. It can withstand recoil from high-caliber firearms without losing zero, ensuring consistent point-of-impact even after numerous shots;
  • Universal Mounting Options: The sight comes with a low-profile Picatinny mount, making it compatible with a wide range of firearms, including pistols, shotguns, and rifles. The top-load battery system allows for easy battery replacement without removing the sight, minimizing disruptions during shooting sessions;
  • Long Battery Life: The Venom Red Dot boasts an impressive battery life, providing up to 150 hours of continuous use at maximum brightness. Such extended battery life reduces the need for frequent battery replacements and provides peace of mind during extended shooting sessions;
  • User-Friendly Controls: The sight’s controls are intuitively designed and positioned on the side for easy access. Users can easily adjust brightness levels and switch between manual and automatic brightness modes, enabling quick adaptation to changing lighting conditions;
  • Auto-Brightness Mode: This valuable feature automatically adjusts the dot’s brightness based on ambient lighting conditions, ensuring optimal visibility of the aiming point in various lighting conditions, thus enhancing accuracy and target acquisition.

Cons:

  • While the Venom Red Dot provides impressive battery life, it’s important to note that this figure is based on maximum brightness settings. If you frequently use the maximum brightness level, battery life may decrease, necessitating more frequent battery replacement.

Other Potential Drawbacks:

  • Slightly Bulkier: Compared to some other red dot sights available in the market, the Venom Red Dot may be considered slightly bulkier. While this doesn’t significantly impact its performance, users who prefer ultra-compact designs might find it less appealing;
  • Dot Size for Precision: The Venom Red Dot has a 3 MOA dot size, which is suitable for various shooting scenarios but may not be ideal for highly precise shots at longer distances. Some users who require a smaller dot size for exceptionally accurate shots might prefer an option with a smaller dot.

Additional Considerations:

It’s important to note that these potential drawbacks are relative, and the Venom Red Dot still offers excellent performance for most shooters. The choice of a red dot sight ultimately depends on your specific shooting needs and preferences.

What is a Vortex Venom Good For?

The Vortex Venom is a versatile red dot sight designed to tackle a wide range of shooting tasks. Here are some scenarios and purposes where the Vortex Venom excels:

  • Handgun Shooting: The Vortex Venom is often mounted on handguns, making it an excellent choice for pistol shooters. It enhances speed and target accuracy, making it ideal for competitive shooting, self-defense, and general handgun use;
  • Rifle Shooting: If you use a rifle for hunting, target shooting, or tactical purposes, the Venom Red Dot can be mounted on various firearm platforms, including AR-15s and shotguns. It provides fast target acquisition and is suitable for both short and medium distances;
  • Shooting Sports: For shooting sports such as clay pigeon shooting or practical shooting, the Venom Red Dot is a valuable accessory due to its quick target acquisition and ease of use. It helps shotgun enthusiasts effectively track and hit moving targets;
  • Tactical Applications: Law enforcement officers and military personnel often use red dot sights for tactical operations. The Venom Red Dot provides rapid target acquisition, especially in close-quarters combat, making it a valuable tool for professionals in these fields;
  • Competitive Shooting: Competitors in disciplines like USPSA (United States Practical Shooting Association) and IPSC (International Practical Shooting Confederation) benefit from the speed and precision offered by the Venom Red Dot. It helps athletes save valuable seconds during shooting;
  • Home Defense: When it comes to home defense, quick and accurate target acquisition is crucial. The Venom Red Dot can be mounted on shotguns or pistols for home defense, allowing homeowners to respond effectively to potential threats;
  • Recreational Shooting: Whether you’re shooting at the range, with friends, or enjoying a day of recreational shooting, the Venom Red Dot enhances the enjoyment and satisfaction of shooting sports;
  • Low-Light Shooting: Thanks to its multiple brightness settings and auto-brightness mode, the Venom Red Dot performs well in various lighting conditions, including low-light and twilight conditions. This makes it suitable for use during dawn or dusk hunts;
  • Training and Skill Development: For those looking to improve their shooting skills, the Venom Red Dot helps refine accuracy and target transitioning due to its ease of use and rapid sight picture acquisition.

The Vortex Venom is suitable for a wide range of tasks, including pistol shooting, rifle shooting, shotgun use, competitive shooting, home defense, and recreational shooting. Its quick target acquisition, durability, and adaptability to different firearms make it a popular choice among firearms enthusiasts, law enforcement professionals, and competitive shooters. Ultimately, its versatility and performance make it a valuable addition to various shooting setups.

Conclusion

In the world of red dot sights, the Vortex Venom Red Dot from Vortex Optics stands out. Its technical specifications, optical clarity, durability, and versatility make it a reliable choice for shooters of all levels. Whether you’re a competitive shooter, a tactical operator, or a firearms enthusiast, the Venom Red Dot helps you acquire targets quickly and make accurate shots. Despite some minor drawbacks, overall performance and build quality make it a worthy addition to your firearms.

In conclusion, if you’re in the market for a red dot sight that offers both speed and precision, the Vortex Venom Red Dot deserves serious consideration. The combination of technical excellence and real-world performance makes it a valuable tool for those looking to enhance their shooting capabilities.

History of the origin of sniper sights

The first attempts to equip guns with sniper sights were made during the Wild West times in the USA in the 19th century. The idea was to fix a telescopic tube to a rifle, replacing standard sights with it. A crosshair of thin metal rods on one of the lenses of the telescopic tube was used to aim the target.

At first sniper sights were cumbersome – their length exceeded the length of the rifle itself and their accuracy left much to be desired. That situation changed during World War I (1914-1918), when the sniper sights were significantly modernized and became widespread in the armies of all the warring parties. As a result of the refinement, the telescopic sight became removable, its weight and dimensions were reduced, and its optical capabilities were improved by prismatic lenses.

After the Second World War in 1949 the American inventor Frederick Kales developed a telescopic sight with variable magnification, and in 1953 a telescopic sight with electronic illumination was adopted by the US Army. Since then optical sights design has not undergone significant changes.

Optical sights
An optical sight is an optical tube with several lenses and a reticle. Typically, such sights have a magnification of 2x to 20x. Also they have correction mechanism – vertical and horizontal. The corrections are made by rotating two corresponding screws.

In order to make a shot with a telescopic sight, it is enough to connect the crosshairs with the enlarged image of the target. Also, some models of scopes are equipped with LED illumination, which allows you to aim in poor lighting conditions, such as at dusk.

Advantages of telescopic sights:
possibility of repair in the field;
Possibility to use in any weather conditions and temperatures;
High accuracy at great distances.

Optical sights are quite reliable, but they can fail from mechanical impacts, so they require some caution in use. It is also extremely difficult to fire at close range from a telescopic sight, especially at moving targets.

Sighting reticles of telescopic sights

Sighting reticles can be made in the form of two metal wires crossing each other or drawn on the glass. The reticle may be located in the middle of the device, then the image in the plane will be inverted or in the area of the eyepiece with a straight image. All reticles can be divided into hunting reticles and tactical reticles.

Hunting reticles are simpler and are primarily designed for short-range hunting. They may be in the form of crosses with complete or incomplete lines, that is to form, as a full cross, and a half cross. Nets used for corral animals, have a large angle of view, and may be classic crosshair, and with a point or circle.

Sighting nets with an additional division along the vertical line, are called ballistic. Such a division makes it easy to determine the distance to the target.

Tactical reticles are used mainly by military snipers and sportsmen. They work under a certain caliber and distance. For hunting purposes, tactical reticles can be simpler and more versatile.

Sight mounts
Whichever scope you choose, you’ll need a special mount to mount it to your gun. Types of scope mounts:

Air gun scope mounts
Monoblock – the most rugged and reliable option for mounting on the weapon. In this system, the rings and the base is one piece. Such a solution will appeal to those who do not plan to frequently change the sight on the weapon;
Rings – this is the most popular type of mount. Their appearance is due to their name. There are rings with usual screw clamp and quick-release ones. Quick-release ones will suit shooters who plan to change them frequently depending on shooting conditions.

Also, there are two basic types for landing scopes:
“dovetail” 11 mm wide (differs by its versatility). It can be used to fit any telescope sight

Viper (Picatinny) bar 22 mm wide: this is the improved version of “dovetail”. It is a more complex mount. In this case optics is fixed as securely as possible.

Carefully choose all the necessary accessories for the telescopic sight, their quality largely determines the success of shooting. Contact only specialized stores and trusted resellers.

How to choose a scope for an air rifle

To improve the accuracy of air rifles and simplify the process of their use, rifles are fitted with an additional telescopic sight. This device repeatedly increases the distance to the target due to the approach of special optics mounted on the weapon.

At the moment in specialized stores offers a large selection of these devices, but first you need to determine for what purposes, you need a telescopic sight. Depending on the specific use, the device must have its own advantages and additional features, which greatly facilitate the sighting and observation at long distances.

However, almost every model of the device should have such qualities as:

A scope for hunting.
To zoom in on an object, increasing its size.
Have its own focal length.
Reduce the load on the eyesight, by placing the target and sighting reticle at the same distance from the pupil.
If you have vision problems, the ability to adjust the optics to suit you, aiming without glasses.
The use of lenses with enlightening, which makes it possible to distinguish clearly the object of pursuit even in dusk, rain or other poor weather conditions.

Since the main purpose of a telescopic sight is to accurately aim at a target at a remote distance, the main criterion in choosing a device is its magnification of aiming. Here everything also depends on the type of weapon on which the optics will be installed. Sight for hunting at small distances can have a small and average multiplicity, at long distances more serious devices with a smaller field of view are used, but with increased focusing.

In addition, when choosing, one should take into account the type of shooting, will it be an open field or dense terrain.

Types of sights
All devices differ from each other by their configuration, optical scheme, accuracy of alignment on the weapon and other characteristics. In order not to get confused in all the variety of proposals and choose the optic sight best suited to you, first of all you need to decide on their main types. The most common options for pneumatics are considered:

Optical – this is a complex device, consisting of lenses of multiple magnification. It is distinguished by increased accuracy and looks like a telescope. It is installed on rifled weapons.

Collimator sights – have a large viewing angle, convenient when shooting in motion and at moving targets. According to the type of sighting device can be open or closed.

Laser – has a similarity to a laser pointer, but only with vertical and horizontal adjustment options. The laser beam is projected onto the target surface as a glowing dot.

Mechanical – consists of a front sight and a rear sight that are in line with each other. Depending on the design, the rear sight may have a fixed or fixed bar. To hit the target, it is enough to align the front sight and the rear sight on the same line.